Archive: 2011

Expand your home LAN to internet using OpenVPN

I’m UNIX guy and loves ssh to connect other servers, but I have to configure ssh-tunneling every time when I want to use other port than 22/tcp. SSH-tunneling is suit for me in some view. SSH-tunneling can go through SOCKS proxy, but this work is very little thing but just a little bit stressful for me. There is some limitation about ssh-tunneling. Some protocol such as Windows file sharing needs UDP and ssh-tunneling cannot treat with it. Your underling network configuration is bound by your local network, so you cannot resolve your home server’s host name using your home DNS server. So, I’ve tried to dig external network to my home network using OpenVPN.

1. Overview

OpenVPN is a little difficult to think about.

  1. OpenVPN allows several style of connection such as point-to-point and access server(one server-to-many client). I’ve chosen access server style configuration. Under this configuration, One access server wait for connection from client. When connection established, server acts as gateway to your home network.
  2. OpenVPN uses SSL, so you have to setup several certificate which is need to establish SSL network connection.
  3. OpenVPN allows several authentification when you are going to establish VPN connection. password authentication, certificate authentification, and both of them.
OpenVPN also has many many feature. If you want to know what OpenVPN can do, please refer ["What is OpenVPN?" page](http://openvpn.net/index.php/open-source/333-what-is-openvpn.html).

2. Big Picture for test

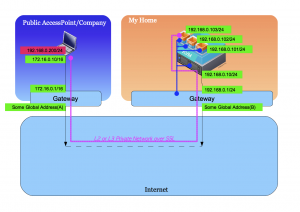
So, I’m going to try to deploy testing environment. Here is big-picture about testing environment.

You can see one server in “My Home” area. This server is virtualized with kvm and software switch using bridge-utils. There are three virtual server on one physical server and one virtual server of thee is OpenVPN server. “My Home” LAN and WAN is separated with gateway and access from external network is limited, but I’ve set that (B):1194/udp goes directly to 192.168.0.103:1194/udp and vice versa.

Also you can see one notebook in “Public Access/Company” area. This notebook is Windows and I’ve installed OpenVPN client, some certificate and keys. When this notebook try to connect to “My Home”’s OpenVPN server, this notebook is going to connect to (B):1194/udp. When negotiation between OpenVPN server and client success, virtual network adapter which address is 192.168.0.200/24 is created on notebook and some packet belonging to 192.168.0.0/24 is encrypted and goes through virtual network which is written in pink color line at picture above and arrives to 192.168.0.103/24, then packets is decrypted and goes from 192.168.0.103 to some address in 192.18.0.0/24 subnet. This is written in blue line at picture above.

You should use UDP for VPN connection instead of TCP. Please read “Why TCP Over TCP Is A Bad Idea”. Therefore any protocol over ssh is also bad idea because you accumulate using TCP stack as a result. When you use TCP over UDP, UDP act as (maybe lossy) network link and UDP doesn’t care about timeout and retransmission, but TCP does it instead of underling UDP. But some company permits only TCP to go through proxy server. So OpenVPN also supports to use TCP for VPN connection.

3. Environment

Ok. Now let me start to deplyment.

  • OpenVPN Server: Scientific Linux 6
  • kernel: 2.6.32-131.2.1.el6.x86_64
  • openvpn-2.1.4-1.el6.x86_64
  • also uses bridge-utils and openssl
  • OpenVPN Client: Windows 7
  • OpenVPN for Windows

4. How to deploy environment

4.1. install Schientific Linux 6 and OpenVPN package

I’ve installed Scientific Linux 6 into virtual host. Virtual hosts including this OpenVPN server is connected to bridge device and goes through physical ethernet interface. Then I’ve installed openvpn-2.1.4-1.el6.x86_64 using yum command.

# yum install openvpn 

Do not forget to disable SELinux and Firewall.

4.2. Create some public/private key pairs

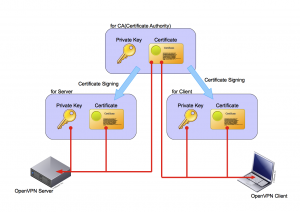
OpenVPN requires some public key certificate/private key pair for mutual authentification. You have to create three pairs at least.

  • for CA(Certificate Authority)
  • for Server(OpenVPN server)
  • for Client(OpenVPN client)

I drew type of certificates and which component should be installed to server and client.

4.2.1. Create your CA’s certificate and private key

Under Scientific Linux 6 environment, you can create your CA’s certificate and private key easy. Red character shows what you should type.

# cd /usr/share/openvpn/easy-rsa/2.0
# . ./vars
# ./clean-all
# ./build-ca
Generating a 1024 bit RSA private key
.................++++++
..++++++
writing new private key to 'ca.key'
-----
You are about to be asked to enter information that will be incorporated
into your certificate request.
What you are about to enter is what is called a Distinguished Name or a DN.
There are quite a few fields but you can leave some blank
For some fields there will be a default value,
If you enter '.', the field will be left blank.
-----
Country Name (2 letter code) [US]:<your country>
State or Province Name (full name) [CA]:<your province>
Locality Name (eg, city) [SanFrancisco]:<your city>
Organization Name (eg, company) [Fort-Funston]:<your organizaton>
Organizational Unit Name (eg, section) []:
Common Name (eg, your name or your server's hostname) [Fort-Funston CA]:<your hostname>
Name []:
Email Address [me@myhost.mydomain]:
# ls keys
ca.crt  ca.key  index.txt  serial
# cat keys/ca.crt 
-----BEGIN CERTIFICATE-----
MIIDezCCAuSgAwIBAgIJAKIB35vl1bhxMA0GCSqGSIb3DQEBBQUAMIGGMQswCQYD
(snip)
ehatRw9UmWMPz+ASZ/VW8M0DXs/TgZd5FAXg7DtP9Q==
-----END CERTIFICATE-----
# cat keys/ca.key
-----BEGIN PRIVATE KEY-----
MIICdgIBADANBgkqhkiG9w0BAQEFAASCAmAwggJcAgEAAoGBALUUl0Uk9mrHhVdH
(snip)
xvndx7Vqja46rg==
-----END PRIVATE KEY-----
#

4.2.2. Create certificate and private key for OpenVPN server

This operation is continuous from 4.2.1.

# ./build-key-server server
Generating a 1024 bit RSA private key
.................++++++
..++++++
writing new private key to 'server.key'
-----
You are about to be asked to enter information that will be incorporated
into your certificate request.
What you are about to enter is what is called a Distinguished Name or a DN.
There are quite a few fields but you can leave some blank
For some fields there will be a default value,
If you enter '.', the field will be left blank.
-----
Country Name (2 letter code) [US]:<your country>
State or Province Name (full name) [CA]:<your province>
Locality Name (eg, city) [SanFrancisco]:<your city>
Organization Name (eg, company) [Fort-Funston]:<your organizaton>
Organizational Unit Name (eg, section) []:
Common Name (eg, your name or your server's hostname) [Fort-Funston CA]:<your hostname>
Name []:
Email Address [me@myhost.mydomain]: 

Please enter the following 'extra' attributes
to be sent with your certificate request
A challenge password []:<your challenge password, blank is allowed>
An optional company name []:
Using configuration from /usr/share/openvpn/easy-rsa/2.0/openssl.cnf
Check that the request matches the signature
Signature ok
The Subject's Distinguished Name is as follows
countryName           : PRINTABLE:'JP'
stateOrProvinceName   : PRINTABLE:'Tokyo'
localityName          : PRINTABLE:'Shinagawa'
organizationName      : PRINTABLE:'mycompany'
commonName            : PRINTABLE:'myserver.mydoamin'
emailAddress          :IA5STRING:'me@myhost.mydomain'
Certificate is to be certified until Jul 19 12:38:58 2021 GMT (3650 days)
Sign the certificate? [y/n]:y

1 out of 1 certificate requests certified, commit? [y/n]y
Write out database with 1 new entries
Data Base Updated
# ls keys
01.pem  ca.key     index.txt.attr  serial      server.crt  server.key
ca.crt  index.txt  index.txt.old   serial.old  server.csr
# cat keys/server.crt 
Certificate:
   Data:
       Version: 3 (0x2)
       Serial Number: 1 (0x1)
       Signature Algorithm: sha1WithRSAEncryption
       Issuer: C=JP, ST=Tokyo, L=Shinagawa, O=mycompany, CN=myserver.mydomain/emailAddress=me@myhost.mydomain
       Validity
           Not Before: Jul 22 12:38:58 2011 GMT
           Not After : Jul 19 12:38:58 2021 GMT
       Subject: C=JP, ST=Tokyo, L=Shinagawa, O=mycompany, CN=myserver.mydoamin/emailAddress=me@myhost.mydomain
       Subject Public Key Info:
           Public Key Algorithm: rsaEncryption
               Public-Key: (1024 bit)
               Modulus:
                   00:d2:38:76:8a:af:4c:c5:fc:94:e9:a0:c6:49:93:
                   59:ef:16:99:af:8b:e3:8f:69:fa:e4:09:eb:be:c4:
                   7f:e2:4b:db:cb:f4:64:f1:d9:42:29:9b:3c:ff:8f:
                   60:60:cf:9c:33:10:51:05:cf:9c:04:fb:da:e3:8f:
                   5e:a6:7f:11:b4:39:fd:74:75:72:38:20:af:89:f0:
                   f7:ab:ad:3d:90:21:bd:0e:07:ab:f4:0b:ec:b7:cb:
                   3e:d8:37:76:86:91:e2:16:c6:92:37:b8:62:16:8e:
                   ff:9c:87:f9:98:c6:09:a1:7f:bc:28:dc:70:bc:7a:
                   7b:1e:a4:0c:9b:e7:4b:ba:d9
               Exponent: 65537 (0x10001)
       X509v3 extensions:
           X509v3 Basic Constraints:
               CA:FALSE
           Netscape Cert Type:
               SSL Server
           Netscape Comment:
               Easy-RSA Generated Server Certificate
           X509v3 Subject Key Identifier:
               18:9C:4E:40:03:C1:E0:EE:58:D2:C8:D0:78:80:ED:BA:B2:41:03:2E
           X509v3 Authority Key Identifier:
               keyid:33:B9:D8:5A:98:06:DA:B1:B1:7E:EC:75:C3:85:32:7B:63:7D:71:C1
               DirName:/C=JP/ST=Tokyo/L=Shinagawa/O=mycompany/CN=myserver.mydomain/emailAddress=me@myhost.mydomain
               serial:A2:01:DF:9B:E5:D5:B8:71

           X509v3 Extended Key Usage:
               TLS Web Server Authentication
           X509v3 Key Usage:
               Digital Signature, Key Encipherment
   Signature Algorithm: sha1WithRSAEncryption
       85:0b:14:5d:03:d7:c0:80:2a:b1:b5:de:60:d0:1f:dc:aa:b6:
       b4:0e:f4:c8:8e:3f:0d:90:43:b0:f1:e0:69:cd:d3:4f:40:cf:
       76:5f:f4:d6:60:44:ca:49:c9:b5:b0:fa:a4:3f:ba:19:e5:d9:
       6e:f2:f5:b3:70:53:0b:be:c4:aa:2c:f2:a5:89:4f:c1:d3:9a:
       1c:f5:16:63:f6:ab:b4:0c:36:97:07:a3:a7:99:65:84:36:b1:
       03:25:8f:32:ca:54:62:c3:e2:73:e8:ef:19:19:bd:2d:6a:f3:
       29:3e:3a:bc:54:b5:45:c8:a7:b0:54:e4:eb:f0:38:f2:0a:b9:
       0a:6a
-----BEGIN CERTIFICATE-----
MIID3TCCA0agAwIBAgIBATANBgkqhkiG9w0BAQUFADCBhjELMAkGA1UEBhMCSlAx
(snip)
VGLD4nPo7xkZvS1q8yk+OrxUtUXIp7BU5OvwOPIKuQpq
-----END CERTIFICATE-----
# cat keys/server.key
-----BEGIN PRIVATE KEY-----
MIICeAIBADANBgkqhkiG9w0BAQEFAASCAmIwggJeAgEAAoGBANI4doqvTMX8lOmg
(snip)
bZgJU2uKuRfpVqTd
-----END PRIVATE KEY-----
#

4.2.3. Create certificate and private key for OpenVPN client

This operation is continuous from 4.2.2.

# ./build-key client
Generating a 1024 bit RSA private key
.................++++++
..++++++
writing new private key to 'client.key'
-----
You are about to be asked to enter information that will be incorporated
into your certificate request.
What you are about to enter is what is called a Distinguished Name or a DN.
There are quite a few fields but you can leave some blank
For some fields there will be a default value,
If you enter '.', the field will be left blank.
-----
Country Name (2 letter code) [US]:<your country>
State or Province Name (full name) [CA]:<your province>
Locality Name (eg, city) [SanFrancisco]:<your city>
Organization Name (eg, company) [Fort-Funston]:<your organizaton>
Organizational Unit Name (eg, section) []:
Common Name (eg, your name or your server's hostname) [Fort-Funston CA]:<your hostname>
Name []:
Email Address [me@myhost.mydomain]: 

Please enter the following 'extra' attributes
to be sent with your certificate request
A challenge password []:<your challenge password, blank is allowed>
An optional company name []:
Using configuration from /usr/share/openvpn/easy-rsa/2.0/openssl.cnf
Check that the request matches the signature
Signature ok
The Subject's Distinguished Name is as follows
countryName           : PRINTABLE:'JP'
stateOrProvinceName   : PRINTABLE:'Tokyo'
localityName          : PRINTABLE:'Shinagawa'
organizationName      : PRINTABLE:'mycompany'
commonName            : PRINTABLE:'myserver.mydoamin'
emailAddress          :IA5STRING:'me@myhost.mydomain'
Certificate is to be certified until Jul 19 12:38:58 2021 GMT (3650 days)
Sign the certificate? [y/n]:y

1 out of 1 certificate requests certified, commit? [y/n]y
Write out database with 1 new entries
Data Base Updated
# ls keys
01.pem  ca.key      client.key      index.txt.attr.old  serial.old  server.key
02.pem  client.crt  index.txt       index.txt.old       server.crt
ca.crt  client.csr  index.txt.attr  serial              server.csr
# cat keys/client.crt 
Certificate:
   Data:
       Version: 3 (0x2)
       Serial Number: 2 (0x2)
       Signature Algorithm: sha1WithRSAEncryption
       Issuer: C=JP, ST=Tokyo, L=Shinagawa, O=mycompany, CN=myserver.mydomain/emailAddress=me@myhost.mydomain
       Validity
           Not Before: Jul 22 13:03:27 2011 GMT
           Not After : Jul 19 13:03:27 2021 GMT
       Subject: C=JP, ST=Tokyo, L=Shinagawa, O=mycompany, CN=myclient.mydomain/emailAddress=me@myhost.mydomain
       Subject Public Key Info:
           Public Key Algorithm: rsaEncryption
               Public-Key: (1024 bit)
               Modulus:
                   00:c7:55:17:b5:88:8b:9b:64:83:24:f4:fb:80:b7:
                   67:93:2c:40:e9:cb:96:6e:08:3e:f6:b3:df:06:f4:
                   8c:e6:ed:f4:90:07:0e:a1:1a:77:50:6e:e1:40:e5:
                   79:4e:96:08:e4:78:26:59:56:c0:29:27:b0:ed:fd:
                   1f:3d:6b:63:86:ba:3f:39:04:3c:a5:57:d5:b3:5c:
                   92:f3:59:6f:10:0e:be:ad:57:ab:aa:3a:34:17:60:
                   81:69:60:75:73:29:32:ec:84:66:02:53:ff:83:2b:
                   ad:32:d5:e3:aa:0e:25:ab:c1:95:04:35:db:af:f2:
                   83:4d:71:a3:d0:55:90:04:7d
               Exponent: 65537 (0x10001)
       X509v3 extensions:
           X509v3 Basic Constraints:
               CA:FALSE
           Netscape Comment:
               Easy-RSA Generated Certificate
           X509v3 Subject Key Identifier:
               CD:13:BC:C7:57:2B:8D:3F:C1:E2:66:A8:5A:7B:47:2D:43:0E:96:DD
           X509v3 Authority Key Identifier:
               keyid:33:B9:D8:5A:98:06:DA:B1:B1:7E:EC:75:C3:85:32:7B:63:7D:71:C1
               DirName:/C=JP/ST=Tokyo/L=Shinagawa/O=mycompany/CN=myserver.mydomain/emailAddress=me@myhost.mydomain
               serial:A2:01:DF:9B:E5:D5:B8:71

           X509v3 Extended Key Usage:
               TLS Web Client Authentication
           X509v3 Key Usage:
               Digital Signature
   Signature Algorithm: sha1WithRSAEncryption
       81:3d:3c:21:ad:ff:92:9a:d0:1f:1f:10:26:b8:00:cf:e6:06:
       59:20:d9:0d:0e:bf:ba:2c:c3:20:54:32:b6:c3:49:6a:9a:31:
       fb:b2:ed:0d:37:90:6b:10:41:71:23:38:f5:d8:ac:dc:39:9e:
       97:0d:1f:dd:a8:9e:9e:7c:32:75:91:75:ea:80:76:e2:e6:b4:
       51:44:32:d4:a5:9b:e4:28:36:88:34:9c:8a:c5:ee:09:94:f3:
       9e:f9:1b:fc:31:df:42:a4:79:17:65:73:4c:d1:d4:cc:76:b3:
       a7:fb:4f:b6:dd:c8:86:fb:bc:84:93:db:d1:8e:8c:65:64:a8:
       58:93
-----BEGIN CERTIFICATE-----
MIID3TCCA0agAwIBAgIBATANBgkqhkiG9w0BAQUFADCBhjELMAkGA1UEBhMCSlAx
(snip)
joxlZKhYkw==
-----END CERTIFICATE-----
# cat keys/client.key
-----BEGIN PRIVATE KEY-----
MIICdQIBADANBgkqhkiG9w0BAQEFAASCAl8wggJbAgEAAoGBAMdVF7WIi5tkgyT0
(snip)
BBMuuJRvG/fC
-----END PRIVATE KEY-----
#

4.2.4. Generate Diffie-Hellman parameter

For OpenVPN server you have to generate your own Diffie-Hellman parameter.

# cd /usr/share/openvpn/easy-rsa/2.0/
# ./build-dh
Generating DH parameters, 1024 bit long safe prime, generator 2
This is going to take a long time
..............................................................................................................+..............................................................................................+.......................+........................+......+..................+............................................+.........................+..........................+..........................................................+.......................+.................+............................................+................++*++*++*
# ls keys
01.pem  ca.key      client.key  index.txt.attr      serial      server.csr
02.pem  client.crt  dh1024.pem  index.txt.attr.old  serial.old  server.key
ca.crt  client.csr  index.txt   index.txt.old       server.crt
# cat keys/dh1024.pem
-----BEGIN DH PARAMETERS-----
MIGHAoGBAOn6qlt6EnKXCCKXiA6BPEw0ZWsJbA3+LjSCY6Zn2dBQF48HqvdEDtEF
Mib+p/scL3BdeN11rpQ4/oIMzTgHXitJsahb5wbzlMhjvSyQucKqfjrOVsG/ZOYo
Onzrlty926EluiPNA/PP98UNNQCskXR9pKrc4LTAn99fbujr4E9zAgEC
-----END DH PARAMETERS-----
#

4.3. Create OpenVPN configuration file

By default, there is no file under /etc/openvpn. Refer /usr/share/doc/openvpn/sample-config-files and create your own configuration.

This is configuration file I modified and placed as /etc/openvpn/server.conf. Red charactor is modified.

#################################################
# Sample OpenVPN 2.0 config file for            #
# multi-client server.                          #
#                                               #
# This file is for the server side              #
# of a many-clients  one-server              #
# OpenVPN configuration.                        #
#                                               #
# OpenVPN also supports                         #
# single-machine  single-machine             #
# configurations (See the Examples page         #
# on the web site for more info).               #
#                                               #
# This config should work on Windows            #
# or Linux/BSD systems.  Remember on            #
# Windows to quote pathnames and use            #
# double backslashes, e.g.:                     #
# "C:\\Program Files\\OpenVPN\\config\\foo.key" #
#                                               #
# Comments are preceded with '#' or ';'         #
#################################################

# Which local IP address should OpenVPN
# listen on? (optional)
;local a.b.c.d

# Which TCP/UDP port should OpenVPN listen on?
# If you want to run multiple OpenVPN instances
# on the same machine, use a different port
# number for each one.  You will need to
# open up this port on your firewall.
port 1194

# TCP or UDP server?
;proto tcp
proto udp

# "dev tun" will create a routed IP tunnel,
# "dev tap" will create an ethernet tunnel.
# Use "dev tap0" if you are ethernet bridging
# and have precreated a tap0 virtual interface
# and bridged it with your ethernet interface.
# If you want to control access policies
# over the VPN, you must create firewall
# rules for the the TUN/TAP interface.
# On non-Windows systems, you can give
# an explicit unit number, such as tun0.
# On Windows, use "dev-node" for this.
# On most systems, the VPN will not function
# unless you partially or fully disable
# the firewall for the TUN/TAP interface.
dev tap0
;dev tun

# Windows needs the TAP-Win32 adapter name
# from the Network Connections panel if you
# have more than one.  On XP SP2 or higher,
# you may need to selectively disable the
# Windows firewall for the TAP adapter.
# Non-Windows systems usually don't need this.
;dev-node MyTap

# SSL/TLS root certificate (ca), certificate
# (cert), and private key (key).  Each client
# and the server must have their own cert and
# key file.  The server and all clients will
# use the same ca file.
#
# See the "easy-rsa" directory for a series
# of scripts for generating RSA certificates
# and private keys.  Remember to use
# a unique Common Name for the server
# and each of the client certificates.
#
# Any X509 key management system can be used.
# OpenVPN can also use a PKCS #12 formatted key file
# (see "pkcs12" directive in man page).
ca /usr/share/openvpn/easy-rsa/2.0/keys/ca.crt
cert /usr/share/openvpn/easy-rsa/2.0/keys/server.crt
key /usr/share/openvpn/easy-rsa/2.0/keys/server.key  # This file should be kept secret

# Diffie hellman parameters.
# Generate your own with:
#   openssl dhparam -out dh1024.pem 1024
# Substitute 2048 for 1024 if you are using
# 2048 bit keys.
dh /usr/share/openvpn/easy-rsa/2.0/keys/dh1024.pem

# Configure server mode and supply a VPN subnet
# for OpenVPN to draw client addresses from.
# The server will take 10.8.0.1 for itself,
# the rest will be made available to clients.
# Each client will be able to reach the server
# on 10.8.0.1. Comment this line out if you are
# ethernet bridging. See the man page for more info.
;server 10.8.0.0 255.255.255.0

# Maintain a record of client  virtual IP address
# associations in this file.  If OpenVPN goes down or
# is restarted, reconnecting clients can be assigned
# the same virtual IP address from the pool that was
# previously assigned.
;ifconfig-pool-persist ipp.txt

# Configure server mode for ethernet bridging.
# You must first use your OS's bridging capability
# to bridge the TAP interface with the ethernet
# NIC interface.  Then you must manually set the
# IP/netmask on the bridge interface, here we
# assume 10.8.0.4/255.255.255.0.  Finally we
# must set aside an IP range in this subnet
# (start=10.8.0.50 end=10.8.0.100) to allocate
# to connecting clients.  Leave this line commented
# out unless you are ethernet bridging.
;server-bridge 10.8.0.4 255.255.255.0 10.8.0.50 10.8.0.100
server-bridge 192.168.0.103 255.255.255.0 192.168.0.200 192.168.0.210

# Configure server mode for ethernet bridging
# using a DHCP-proxy, where clients talk
# to the OpenVPN server-side DHCP server
# to receive their IP address allocation
# and DNS server addresses.  You must first use
# your OS's bridging capability to bridge the TAP
# interface with the ethernet NIC interface.
# Note: this mode only works on clients (such as
# Windows), where the client-side TAP adapter is
# bound to a DHCP client.
;server-bridge

# Push routes to the client to allow it
# to reach other private subnets behind
# the server.  Remember that these
# private subnets will also need
# to know to route the OpenVPN client
# address pool (10.8.0.0/255.255.255.0)
# back to the OpenVPN server.
;push "route 192.168.10.0 255.255.255.0"
;push "route 192.168.20.0 255.255.255.0"
push "route 192.168.0.0 255.255.255.0"

# To assign specific IP addresses to specific
# clients or if a connecting client has a private
# subnet behind it that should also have VPN access,
# use the subdirectory "ccd" for client-specific
# configuration files (see man page for more info).

# EXAMPLE: Suppose the client
# having the certificate common name "Thelonious"
# also has a small subnet behind his connecting
# machine, such as 192.168.40.128/255.255.255.248.
# First, uncomment out these lines:
;client-config-dir ccd
;route 192.168.40.128 255.255.255.248
# Then create a file ccd/Thelonious with this line:
#   iroute 192.168.40.128 255.255.255.248
# This will allow Thelonious' private subnet to
# access the VPN.  This example will only work
# if you are routing, not bridging, i.e. you are
# using "dev tun" and "server" directives.

# EXAMPLE: Suppose you want to give
# Thelonious a fixed VPN IP address of 10.9.0.1.
# First uncomment out these lines:
;client-config-dir ccd
;route 10.9.0.0 255.255.255.252
# Then add this line to ccd/Thelonious:
#   ifconfig-push 10.9.0.1 10.9.0.2

# Suppose that you want to enable different
# firewall access policies for different groups
# of clients.  There are two methods:
# (1) Run multiple OpenVPN daemons, one for each
#     group, and firewall the TUN/TAP interface
#     for each group/daemon appropriately.
# (2) (Advanced) Create a script to dynamically
#     modify the firewall in response to access
#     from different clients.  See man
#     page for more info on learn-address script.
;learn-address ./script

# If enabled, this directive will configure
# all clients to redirect their default
# network gateway through the VPN, causing
# all IP traffic such as web browsing and
# and DNS lookups to go through the VPN
# (The OpenVPN server machine may need to NAT
# or bridge the TUN/TAP interface to the internet
# in order for this to work properly).
;push "redirect-gateway def1 bypass-dhcp"

# Certain Windows-specific network settings
# can be pushed to clients, such as DNS
# or WINS server addresses.  CAVEAT:
# http://openvpn.net/faq.html#dhcpcaveats
# The addresses below refer to the public
# DNS servers provided by opendns.com.
;push "dhcp-option DNS 208.67.222.222"
;push "dhcp-option DNS 208.67.220.220"
# This is DNS server of my home
push "dhcp-option DNS 192.168.0.101"

# Uncomment this directive to allow different
# clients to be able to "see" each other.
# By default, clients will only see the server.
# To force clients to only see the server, you
# will also need to appropriately firewall the
# server's TUN/TAP interface.
client-to-client

# Uncomment this directive if multiple clients
# might connect with the same certificate/key
# files or common names.  This is recommended
# only for testing purposes.  For production use,
# each client should have its own certificate/key
# pair.
#
# IF YOU HAVE NOT GENERATED INDIVIDUAL
# CERTIFICATE/KEY PAIRS FOR EACH CLIENT,
# EACH HAVING ITS OWN UNIQUE "COMMON NAME",
# UNCOMMENT THIS LINE OUT.
;duplicate-cn

# The keepalive directive causes ping-like
# messages to be sent back and forth over
# the link so that each side knows when
# the other side has gone down.
# Ping every 10 seconds, assume that remote
# peer is down if no ping received during
# a 120 second time period.
keepalive 10 120

# For extra security beyond that provided
# by SSL/TLS, create an "HMAC firewall"
# to help block DoS attacks and UDP port flooding.
#
# Generate with:
#   openvpn --genkey --secret ta.key
#
# The server and each client must have
# a copy of this key.
# The second parameter should be '0'
# on the server and '1' on the clients.
;tls-auth ta.key 0 # This file is secret

# Select a cryptographic cipher.
# This config item must be copied to
# the client config file as well.
;cipher BF-CBC        # Blowfish (default)
;cipher AES-128-CBC   # AES
;cipher DES-EDE3-CBC  # Triple-DES

# Enable compression on the VPN link.
# If you enable it here, you must also
# enable it in the client config file.
comp-lzo

# The maximum number of concurrently connected
# clients we want to allow.
;max-clients 100

# It's a good idea to reduce the OpenVPN
# daemon's privileges after initialization.
#
# You can uncomment this out on
# non-Windows systems.
;user nobody
;group nobody

# The persist options will try to avoid
# accessing certain resources on restart
# that may no longer be accessible because
# of the privilege downgrade.
persist-key persist-tun

# Output a short status file showing
# current connections, truncated
# and rewritten every minute.
status /var/log/openvpn-status.log

# By default, log messages will go to the syslog (or
# on Windows, if running as a service, they will go to
# the "\Program Files\OpenVPN\log" directory).
# Use log or log-append to override this default.
# "log" will truncate the log file on OpenVPN startup,
# while "log-append" will append to it.  Use one
# or the other (but not both).
log         /var/log/openvpn.log
log-append  /var/log/openvpn.log

# Set the appropriate level of log
# file verbosity.
#
# 0 is silent, except for fatal errors
# 4 is reasonable for general usage
# 5 and 6 can help to debug connection problems
# 9 is extremely verbose
verb 4

# Silence repeating messages.  At most 20
# sequential messages of the same message
# category will be output to the log.
;mute 20

client-cert-not-required
username-as-common-name
# Each user require user name and password
plugin /usr/lib64/openvpn/plugin/lib/openvpn-auth-pam.so login
management localhost 7505

And edit some script to work with OpenVPN.

/etc/openvpn/bridge-start

#!/bin/bash

#################################
# Set up Ethernet bridge on Linux
# Requires: bridge-utils
#################################

# Define Bridge Interface
br="br0"

# Define list of TAP interfaces to be bridged,
# for example tap="tap0 tap1 tap2".
tap="tap0"

# Define physical ethernet interface to be bridged
# with TAP interface(s) above.
eth="eth0"
eth_ip="192.168.0.103"
eth_netmask="255.255.255.0"
eth_broadcast="192.168.0.255"

for t in $tap; do
   openvpn --mktun --dev $t
done

brctl addbr $br
brctl addif $br $eth

for t in $tap; do
   brctl addif $br $t
done

for t in $tap; do
   ifconfig $t 0.0.0.0 promisc up
done

ifconfig $eth 0.0.0.0 promisc up

ifconfig $br $eth_ip netmask $eth_netmask broadcast $eth_broadcast

/etc/openvpn/bridge-stop

#!/bin/bash

####################################
# Tear Down Ethernet bridge on Linux
####################################

# Define Bridge Interface
br="br0"

# Define list of TAP interfaces to be bridged together
tap="tap0"

ifconfig $br down
brctl delbr $br

for t in $tap; do
   openvpn --rmtun --dev $t
done

/etc/openvpn/openvpn-startup

#!/bin/sh
/etc/openvpn/bridge-start

/etc/openvpn/openvpn-shutdown

#!/bin/sh
/etc/openvpn/bridge-stop
ifdown eth0
ifup eth0

And modify /etc/init.d/openvpn to work with these scripts.

# Location of openvpn binary
openvpn=""
openvpn_locations="/usr/sbin/openvpn /usr/local/sbin/openvpn"
for location in $openvpn_locations
do
 if [ -f "$location" ]
 then
   openvpn=$location
 fi
done

# Lockfile
lock="/var/lock/subsys/openvpn"

# PID directory
piddir="/var/run/openvpn"

# Our working directory
work=/etc/openvpn

# Source function library.
. /etc/rc.d/init.d/functions

# Source networking configuration.
. /etc/sysconfig/network

# Check that networking is up.
if [ ${NETWORKING} = "no" ]
then
 echo "Networking is down"
 exit 0
fi

# Check that binary exists
if ! [ -f  $openvpn ]
then
 echo "openvpn binary not found"
 exit 0
fi

# See how we were called.
case "$1" in
 start)
   echo -n $"Starting openvpn: "

   /sbin/modprobe tun >/dev/null 2>&1

   # From a security perspective, I think it makes
   # sense to remove this, and have users who need
   # it explictly enable in their --up scripts or
   # firewall setups.

   #echo 1 > /proc/sys/net/ipv4/ip_forward

    # Run startup script, if defined
    if [ -f $work/openvpn-startup ]; then
    $work/openvpn-startup
    fi

   if [ ! -d  $piddir ]; then
       mkdir $piddir
   fi

   if [ -f $lock ]; then
       # we were not shut down correctly
       for pidf in `/bin/ls $piddir/*.pid 2>/dev/null`; do
         if [ -s $pidf ]; then
   	kill `cat $pidf` >/dev/null 2>&1
         fi
         rm -f $pidf
       done
       rm -f $lock
       sleep 2
   fi

   rm -f $piddir/*.pid
   cd $work

   # Start every .conf in $work and run .sh if exists
   errors=0
   successes=0
   for c in `/bin/ls *.conf 2>/dev/null`; do
       bn=${c%%.conf}
       if [ -f "$bn.sh" ]; then
   	. ./$bn.sh
       fi
       rm -f $piddir/$bn.pid
           # Handle backward compatibility, see Red Hat Bugzilla ID #458594
           script_security=''
           if [ -z "$( grep '^[[:space:]]*script-security[[:space:]]' $c )" ]; then
               script_security="--script-security 2"
           fi
       $openvpn --daemon --writepid $piddir/$bn.pid --config $c --cd $work $script_security
       if [ $? = 0 ]; then
   	successes=1
       else
   	errors=1
       fi
   done

   if [ $errors = 1 ]; then
       failure; echo
   else
       success; echo
   fi

   if [ $successes = 1 ]; then
       touch $lock
   fi
   ;;
 stop)
   echo -n $"Shutting down openvpn: "
   for pidf in `/bin/ls $piddir/*.pid 2>/dev/null`; do
     if [ -s $pidf ]; then
       kill `cat $pidf` >/dev/null 2>&1
     fi
     rm -f $pidf
   done

    # Run shutdown script, if defined
    if [ -f $work/openvpn-shutdown ]; then
    $work/openvpn-shutdown
    fi

   success; echo
   rm -f $lock
   ;;
 restart)
   $0 stop
   sleep 2
   $0 start
   ;;
 reload)
   if [ -f $lock ]; then
       for pidf in `/bin/ls $piddir/*.pid 2>/dev/null`; do
   	if [ -s $pidf ]; then
   	    kill -HUP `cat $pidf` >/dev/null 2>&1
   	fi
       done
   else
       echo "openvpn: service not started"
       exit 1
   fi
   ;;
 reopen)
   if [ -f $lock ]; then
       for pidf in `/bin/ls $piddir/*.pid 2>/dev/null`; do
   	if [ -s $pidf ]; then
   	    kill -USR1 `cat $pidf` >/dev/null 2>&1
   	fi
       done
   else
       echo "openvpn: service not started"
       exit 1
   fi
   ;;
 condrestart)
   if [ -f $lock ]; then
       $0 stop
       # avoid race
       sleep 2
       $0 start
   fi
   ;;
 status)
   if [ -f $lock ]; then
       for pidf in `/bin/ls $piddir/*.pid 2>/dev/null`; do
   	if [ -s $pidf ]; then
   	    kill -USR2 `cat $pidf` >/dev/null 2>&1
   	fi
       done
       echo "Status written to /var/log/messages"
   else
       echo "openvpn: service not started"
       exit 1
   fi
       ;;
 *)
   echo "Usage: openvpn {start|stop|restart|condrestart|reload|reopen|status}"
   exit 1
   ;;
esac
exit 0

4.4. Enable OpenVPN service

Finally, enable and start OpenVPN service.

# chkconfig openvpn on
# service openvpn start

Check /var/log/openvpn.log that initialization sequence has been completed.

Fri Jul 22 23:08:54 2011 us=512618 Initialization Sequence Completed

5. Prepare your Windows OpenVPN client

There is many OpenVPN related project now. You feels that OpenVPN configuration is not easy so you want to use some GUI client and I admit. But as far as I know and after my trial, I can say that there is NO GUI client which treats OpenVPN function correctly including official packages.

The best way you can do about Windows client, you should install and use CUI instead of GUI.

5.1. Download and install OpenVPN Windows binary

From OpenVPN download page, you should download windows binary. After download has completed execute package to install.

5.2. Prepare certificate, private key, and configuration file

At 4.2.3. you’ve created certificate and private key for client. Copy them into “C:¥Program Files(x86)¥OpenVPN¥config”. And copy certificate of CA(ca.crt) to same place(“C:¥Program Files(x86)¥OpenVPN¥config”).

And you have to create configuration file as “C:¥Program Files(x86)¥OpenVPN¥config¥client.ovpn”. Here is my example. Red character is modified. You should edit with editor which can handle LF as line feed code. It may be mistake that it set to CR+LF.

##############################################
# Sample client-side OpenVPN 2.0 config file #
# for connecting to multi-client server.     #
#                                            #
# This configuration can be used by multiple #
# clients, however each client should have   #
# its own cert and key files.                #
#                                            #
# On Windows, you might want to rename this  #
# file so it has a .ovpn extension           #
##############################################

# Specify that we are a client and that we
# will be pulling certain config file directives
# from the server.
client

# Use the same setting as you are using on
# the server.
# On most systems, the VPN will not function
# unless you partially or fully disable
# the firewall for the TUN/TAP interface.
dev tap
;dev tun

# Windows needs the TAP-Win32 adapter name
# from the Network Connections panel
# if you have more than one.  On XP SP2,
# you may need to disable the firewall
# for the TAP adapter.
;dev-node MyTap

# Are we connecting to a TCP or
# UDP server?  Use the same setting as
# on the server.
;proto tcp
proto udp

# The hostname/IP and port of the server.
# You can have multiple remote entries
# to load balance between the servers.
remote myserver.mydomain 1194
;remote my-server-2 1194

# Choose a random host from the remote
# list for load-balancing.  Otherwise
# try hosts in the order specified.
;remote-random

# Keep trying indefinitely to resolve the
# host name of the OpenVPN server.  Very useful
# on machines which are not permanently connected
# to the internet such as laptops.
resolv-retry infinite

# Most clients don't need to bind to
# a specific local port number.
nobind

# Downgrade privileges after initialization (non-Windows only)
;user nobody
;group nobody

# Try to preserve some state across restarts.
persist-key
persist-tun

# If you are connecting through an
# HTTP proxy to reach the actual OpenVPN
# server, put the proxy server/IP and
# port number here.  See the man page
# if your proxy server requires
# authentication.
;http-proxy-retry # retry on connection failures
;http-proxy [proxy server] [proxy port #]

# Wireless networks often produce a lot
# of duplicate packets.  Set this flag
# to silence duplicate packet warnings.
;mute-replay-warnings

# SSL/TLS parms.
# See the server config file for more
# description.  It's best to use
# a separate .crt/.key file pair
# for each client.  A single ca
# file can be used for all clients.
ca ca.crt
cert client.crt
key client.key

# Verify server certificate by checking
# that the certicate has the nsCertType
# field set to "server".  This is an
# important precaution to protect against
# a potential attack discussed here:
#  http://openvpn.net/howto.html#mitm
#
# To use this feature, you will need to generate
# your server certificates with the nsCertType
# field set to "server".  The build-key-server
# script in the easy-rsa folder will do this.
ns-cert-type server

# If a tls-auth key is used on the server
# then every client must also have the key.
;tls-auth ta.key 1

# Select a cryptographic cipher.
# If the cipher option is used on the server
# then you must also specify it here.
;cipher x

# Enable compression on the VPN link.
# Don't enable this unless it is also
# enabled in the server config file.
comp-lzo

# Set log file verbosity.
verb 3

# Silence repeating messages
;mute 20

And create user name and password file. I created it as “C:¥Program Files(x86)¥OpenVPN¥config¥auth.cfg”. This file is plain text and line 1 should contain user name and line 2 should contain password.

username
password

Finally create batch file to execute OpenVPN connection.

cd C:¥Program Files(x86)¥OpenVPN¥config
openvpn --client --config client.ovpn --remote myserver.mydomain --proto udp --auth-user-pass auth.cfg

If you want to go through sock proxy when you are about to connect, do like this.

cd C:¥Program Files(x86)¥OpenVPN¥config
openvpn --client --config client.ovpn --remote myserver.mydomain --proto udp --socks-proxy socksserver.yourdomain --auth-user-pass auth.cfg

6. Try your OpenVPN connection

Execute command and confirm that your attempt to try is succeed.

Enjoy your broaden home network !
Remote desktop trial using SPICE protocol via mobile broadband connection

This post is continued story from these posts ( 1, 2, 3 ).

Previously I tried SPICE protocol as alternative of Microsoft’s RDP, but at that time SPICE protocol was very early development so I could not satisfy my needs to use in daily use. But situation has changed. RHEL 6 has included SPICE protocol for VDI, so I’ve tried once again.

1. Environment

  • Physical Host: Scientific Linux 6

  • kernel: 2.6.32-71.el6.x86_64

  • qemu-kvm-0.12.1.2-2.160.el6_1.2.x86_64

  • spice-server-0.8.0-1.el6.x86_64

  • Virtual Desktop: Fedora 15(i686)

  • kernel: 2.6.38.8-35.fc15.i686.PAE

  • xorg-x11-drv-qxl-0.0.21-3.fc15.i686

I’ve also used DNS, ddclient, and some router for this trial.(not written in this post)

2. Create Physical host

First, I’ve created normal kvm host. After the installation, I’ve also installed spice-server via yum.

3. Create Virtual Desktop

This procedure is just a little bit complex. First, I’ve created virtual machine using virt-manager and installed Fedora 15. But virt-manager only treat with VNC connection, so I’ve changed the configuration of virtual machine to work with SPICE.

4. Modify configuration to work with SPICE

After the installation, I’ve dumped configuration of virtual machine to XML file.

1
2
3
4
5
(at Guest OS)
# halt -p
(at Host OS)
# virsh dumpxml <virtual machine name> > <XML filename>
# virsh undefine <virtual machine name>

and edit XML file. Red charactor shows changes from original XML file.

 1
 2
 3
 4
 5
 6
 7
 8
 9
10
11
12
13
14
15
16
17
18
19
20
21
22
23
24
25
26
27
28
29
30
31
32
33
34
35
36
37
38
39
40
41
42
43
44
45
46
47
48
49
50
51
52
53
54
55
56
57
58
59
60
61
62
63
64
65
66
<domain type='kvm'>
  <name>f15</name>
  <uuid>4845a1da-cf61-62dc-783c-d0bff899b68e</uuid>
  <memory>786432</memory>
  <currentMemory>786432</currentMemory>
  <vcpu>1</vcpu>
  <os>
    <type arch='i686' machine='rhel6.1.0'>hvm</type>
    <boot dev='hd'/>
    <boot dev='cdrom'/>
  </os>
  <features>
    <acpi/>
    <apic/>
    <pae/>
  </features>
  <clock offset='utc'/>
  <on_poweroff>destroy</on_poweroff>
  <on_reboot>restart</on_reboot>
  <on_crash>restart</on_crash>
  <devices>
    <emulator>/usr/libexec/qemu-kvm</emulator>
    <disk type='file' device='cdrom'>
      <driver name='qemu' type='raw'/>
      <source file='/mnt/storage/cdimg/fedora/Fedora-15-i386-netinst.iso'/>
      <target dev='hdc' bus='ide'/>
      <readonly/>
      <address type='drive' controller='0' bus='1' unit='0'/>
    </disk>
    <disk type='file' device='disk'>
      <driver name='qemu' type='raw'/>
      <source file='/home/vm/f15.img'/>
      <target dev='vda' bus='virtio'/>
      <address type='pci' domain='0x0000' bus='0x00' slot='0x05' function='0x0'/>
    </disk>
    <controller type='ide' index='0'>
      <address type='pci' domain='0x0000' bus='0x00' slot='0x01' function='0x1'/>
    </controller>
    <interface type='bridge'>
      <mac address='52:54:00:c1:29:97'/>
      <source bridge='br0'/>
      <target dev='vnet4'/>
      <model type='virtio'/>
      <address type='pci' domain='0x0000' bus='0x00' slot='0x03' function='0x0'/>
    </interface>
    <serial type='pty'>
      <target port='0'/>
    </serial>
    <console type='pty'>
      <target port='0'/>
    </console>
    <input type='tablet' bus='usb'/>
    <input type='mouse' bus='ps2'/>
    <graphics type='spice' port='5930' autoport='no' listen='0.0.0.0'/>
    <sound model='ac97'>
      <address type='pci' domain='0x0000' bus='0x00' slot='0x04' function='0x0'/>
    </sound>
    <video>
      <model type='qxl' vram='32768' heads='1'/>
      <address type='pci' domain='0x0000' bus='0x00' slot='0x02' function='0x0'/>
    </video>
    <memballoon model='virtio'>
      <address type='pci' domain='0x0000' bus='0x00' slot='0x06' function='0x0'/>
    </memballoon>
  </devices>
</domain>

After the edit I defined virtual machine again.

1
# virsh define /home/vm/f15.xml

After definition, I cannot see console in virt-manager anymore. The reason is that virt-manager doesn’t support SPICE. So I issued virsh command to boot virtual machine.

1
# virsh start f15

5. Connect virtual machine from Windows client

Windows client bianry can be downloded from spice-space.org. I’ve downloaded spice-client-win32-0.6.3.zip and spice_libs_win32_063_and_earlier.zip.

After download, I unzipped both package and moved spicec.exe to libs directory for spicec.exe works with some libraries.

6. User Experience

I’ve tried. See movie.

7. Conclusion

SPICE protocol works good with mobile broadband and LAN connection, but you will feel some stress about some multimedia experience. SPICE connection via mobile broadband will consume about 800kbps bandwidth from my experience.

Enjoy.

Samba Winbind Trial Log

In the past and UNIX world, people who want aggregate authentication repository always used NIS. Several company and guys still may use NIS now, I heard from some colleague. We UNIX people can use LDAP for centralized authentication. Old days, all of company worker were walking around UNIX sysadmin, but now many of them live in Windows world and uses Active Directory for authentication and UNIX people have to fit them to AD. Thanks to desired samba community, we can use winbind and UNIX server can talk to AD, join itself to AD-forrest and user who is not registered in local authentication can log in UNIX server. I tried to create test environment similar to real world, and confirmed that my Linux box can talk AD server. I will write how-to for other people who want to try. 1. Environment

  • Windows Server: I’ve tried Windows Server 2008.
  • Linux Box: (also I’ve tried) Scientific Linux 6.0 (x86_64).
  1. Install Windows Server, create Active Directory repository, and create user account for test

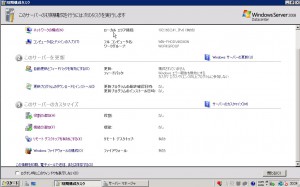
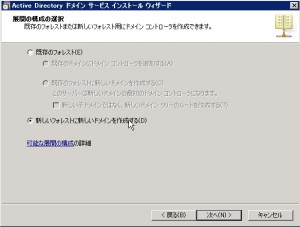
First, I installed Windows Server 2008 into my test box. After I installed Windows Server 2008, I created Active Directory. If you haven’t experienced how to create AD, please see my screenshot below.

After the installation, you will see the welcome window. Please choose “Add Role” link.

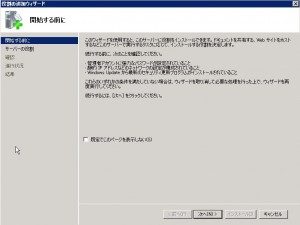
You’ll see welcome window of “Add Role”. Click Next.

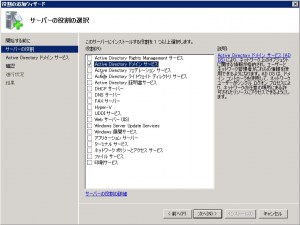
You can choice the role what you want. Choose “Active Directory Domain Service”, and click Next. (You may doubt whether you should also install “DNS Server”. As notification says, you have not to install DNS Server in this time. After the installation of Active Directory Domain Service, you will configure Active Directory forrest. In this configuration, configuration wizard asks whether you install DNS server or not.)

After the installation, you will have to reboot server. After reboot, launch dcpromo.exe.

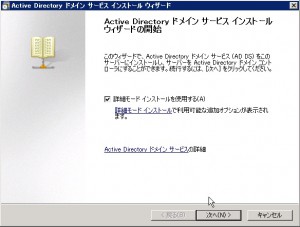
This is welcome window of dcpromo.exe. I’ve chosen “Detailed installation mode”.

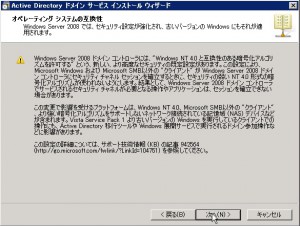
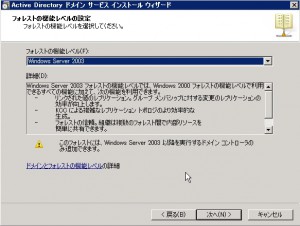
In the Windows world, there is some security setting for contemporary client such as Windows Vista and Windows 7. Unfortunately I have not enough knowledge about these security setting, so I chose “Windows 2003” level of security because I suspect that may sysadmin is now using Windows Server 2003 in the real world…

Make new AD-forest.

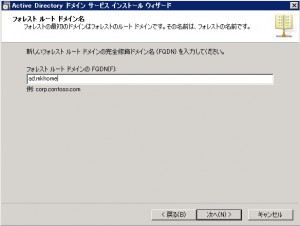
Specify the name for new AD forest. This name will be the part of FQDN. Each hostname under this AD will be ..

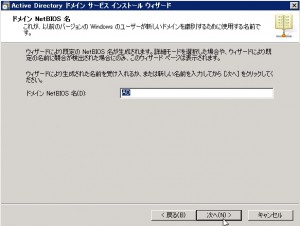
Specify the name for NetBIOS. I don’t know enough knowledge about NetBIOS, but many people says that you should specify same name as forest name.

Specify the level of function for this forest. I chose “Windows 2003” as I wrote just before.

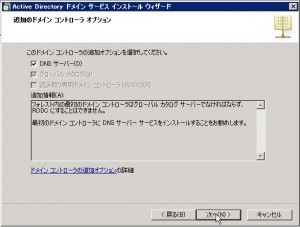
Specify the option for this installation. I chose “DNS Server” because I’ve heard that AD must be worked with DNS. Some guru may know how to work AD without DNS, but I will obey the major myth…

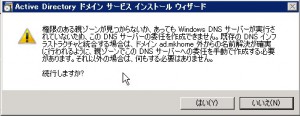
You may see some warning which related to DNS tier. If you have some AD in your network, you may see no warning.

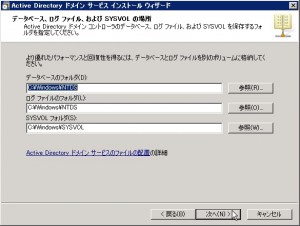
Specify the location for each log. I leaved them default.

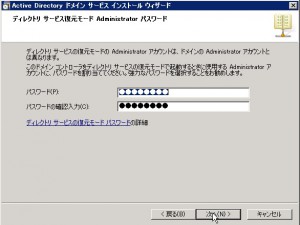
Specify the password for “Directory service recovery mode”. If you want to do without your joy, I recommend not to forget.

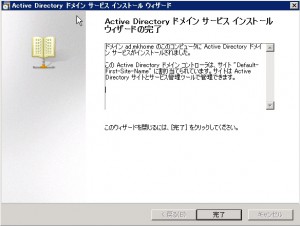
Installation finished. I rebooted at this point. Machine start to work as Active Directory server.

After the reboot, I created user account for testing.

  1. Install Scientific Linux

As client machine, I installed Scientific Linux 6.0 (x86_64). I included samba packages.

  1. Create /etc/samba/smb.conf

Edit /etc/samba/smb.conf to suit for Active Directry server. I wrote like this.

[global] workgroup = <NetBIOS’s domain name> password server = realm = security = domain idmap backend = tdb idmap uid = 10000-19999 idmap gid = 10000-19999 idmap config : backend = rid idmap config : range = 20000 - 29999 template shell = /bin/bash winbind use default domain = yes winbind offline logon = false dos charset = CP932 unix charset = UTF-8 display charset = UTF-8 You may add sharing option like this.

[nas] path = /home/nas writable = yes 5. Join Linux box to AD forrest

Now, You can join your linux client to Active Directory forest. Issue this command.

net ads join -U Administrator password: <Domain Administrator’s password> You may experience that net command failed to add client’s host name to DNS service. When you experienced, you should add your linux client to DNS manually.

  1. test authentication and see shared file system

You can access shared file system which linux client serves. When you asked user name and password, try them which you’ve set to AD. If everything goes good, you will see shared file system.

  1. using AD authentication for SSH

In addition to share file system, you can use user name and password which you’ve set to AD to some other authentication such as ssh.

First, you have to install winbindd.

yum -y install samba-winbind Next, modify /etc/nsswitch.conf

passwd: files winbind shadow: files winbind group: files winbind Finally, start winbindd service.

chkconfig winbindd on # service winbindd start If you have good experience about system-config-authentication, it may be good to use it. ( I think it is just a little bit confusing… )

Sharing NFSv4 between solaris server and linux client

When you’ve mount NFSv4 filesystem from linux client to solaris server, you may experience user and group goes “nobody”.

First, check proper export setting.

1
share -F nfs -o rw,sec=sys,root=@xxx.xxx.xxx.xxx/24 /filesystem

According to man page of share_nfs, you have to specify proper security and hostname or range of ip address. If you want to set it to ip address, do not forget to set “@” in front of ip address. Otherwise these character is identified as hostname. Again, read man page of share_nfs carefully !

Next, check /etc/idmapd.conf in client.

1
2
[General]
Domain = mydomain

You may set your domain name, I think.

Finally, check the service setting. You also have to proper setting for mount.

1
2
3
rpcbind        	0:off	1:off	2:on	3:on	4:on	5:on	6:off
rpcgssd        	0:off	1:off	2:off	3:on	4:on	5:on	6:off
rpcidmapd      	0:off	1:off	2:off	3:on	4:on	5:on	6:off

Enjoy.

Natural broiled eel at Kashima port

As for my first trip with new Smart K, I’ve get to Kashima port. It takes about 150km from my home and takes about 3 hours. The subject of this trip to test my ETC and sound device. Here is the itinerary(GPS data is partially dropped). Thanks to aprs.fi, I can plot my itinerary over Google map. I always use iBCNU on my iPhone and upload GPS information with my call-sign. If you have your license of amateur radio, try it ! Smart and my devices works perfectly among the trip, so my trip is very smooth and fun. Here is the place named “Kamisu city public sport park”. This place is nearby of Pacific ocean. MOVIE and I saw some windmill generator. After the 3.11, many people addicted to renewable energy instead of nuclear power. Kashima area is the one of the biggest windmill farm in Kanto area. Windmills in this area can generate about 50MW electricity, but today some of windmill stopped because of lack of winds. And some area still marks some destruction caused by that earthquake. These cracks is widely marked and needs more costs and times to repair. This photo is effected. Kashima area is famous about eel especially natural eel to eat. Some foreign people may surprise that Japanese people eats such bizarre fish. Surely, some people feels dislike about eel because it is slimy to the touch and shape is strange. But broiled eel have rich protein, soft and light food texture especially natural eel. So, I’ve decide to try it. This is the shop to try. The name is “Kappo Tabeta(割烹 たべた)”(Google Map). This shop goes famous via TV show and some internet site Tabelog serving broiled natural eel over 20 years. Tabelog is japanese shop curation site such as yelp. “Kappo Tabeta” gets good score in Tabelog. This photo is what I’ve eaten. Broiled natural eel - standard size(天然うな重, 並). This order is served with clam miso soup, pickles, and mellon flavored jelly. It tastes great ! If you have no issue with broiled eel, you should try it.

Smart drive is fun

Last week, I bought MCC Smart K instead of Toyota Celica which I run around over 8 years. The main reason why I replaced my car is to reduce tax against car. In Japan, there are a few tax around having my own car. When you buy your car, it subjects to duty (Vehicle excise tax). When you run your car 1 year, it subjects to duty(Road tax). When you check your car health every 2 year, it subjects to duty(Automobile weight tax). I had paid about $1,000 every 2 years for my Celica. I will have to pay about $400 in next 2 years, so I will be able to save $600 ! MCC Smart is one of the smallest car in the world. I love this feature. I feel that my life is optimized in busy Tokyo. My friend said me just a little bit crazy, but I don’t care. I need not to bring any big baggage such as golf bag, tons of travel baggage, cannon shaped camera, and some servers. ;-) But Smart K I bought is started to sell about 10 years ago, so it lacks some important and contemporary feature such as ETC(Electric Tall Collection) and iPod connectivity. So I hacked a little bit and added such feature. Here is the room of my Smart after my hack. You will see tiny ETC device on the middle of dashboard. ETC is connected from fuse box located in passenger seat. I uses some fuse distributer which supply 24V direct current to ETC device. And I replaced default sound unit to alternative device which can accept line-input. I moved it from my old Celica. Finally, I placed iPod dock unit into accessory box and connect USB power and audio line. You will see small white feature in the middle of my photo. I can put my iPhone to that dock and listen some iPod and ShoutCast internet radio. Yes, I love ShoutCast !

DenyHosts for brute force SSH login attacks

I’m using a few hosts for my joy. I can also log into these hosts from outside of my home via Internet. This is very useful ! I only uses SSH for my safety and other port have been closed, so many of threat is shut out. But many brute-force attackers try to log into my server via SSH day by day. This useless trial is very noisy. Many of them feels so same like me. So, let me write about denyhosts. HowToForge writes good article. I’ve referred this article. I’m using Scientific Linux 6.0 (x86_64). So first, I enabled epel repository. Please refer this wiki page how to enable epel repository. This article also works with Scientific Linux. and, install denyhosts. # yum install denyhosts Default configuration file (/etc/denyhosts.conf) is suit for SSH limitation. If you only want to limit SSH login trial, leave it default. finally, enable denyhosts and start it. # chkconfig denyhosts on # service denyhosts start That’s it. If your server experienced brute force attack, you’ll got mail like this. From: DenyHosts nobody@loginserver.myhome To: root@loginserver.myhome Subject: DenyHosts Report from loginserver.myhome Date: Mon, 30 May 2011 21:15:43 +0900 Added the following hosts to /etc/hosts.deny: xxx.xxx.xxx.xxx (unluckyserver.domainname) ———————————————————————-
ustreamの録画スクリプトを公開します

公益に資すると思いますのでustreamを見ることができない人、インターネット環境に容易にアクセスできない方に映像を届けることができるように、ustreamの録画スクリプトを公開します。 ダウンロード当初の目的を果たしたと思いますのでダウンロードは停止しました。欲しい方はメールでご連絡ください 使用するためには以下のperlモジュールをインストールしてください。 * utf8

  • Encode
  • Data::Dumper
  • LWP::Simple また以下のコマンドを使用できるようにしてください * rtmpdump 内部でuStreamのDeveloper IDに紐づくAPI keyが入っていますが、そのまま利用いただいて構いません。ただしDeveloper APIの利用は1日に5000回に制限されていますので、可能な限りDeveloper登録をして、API keyを取得し、スクリプト内部のAPI keyを書き換えてください。 uStreamのDeveloper登録は以下のURLから行うことができます http://developer.ustream.tv/home スクリプトについてご不明な点は私までメールいただければできる限り対応します。

今日は自宅サーバにUPSを取り付けた

残念ながら地震の影響で福島原発を含む東京電力の発電能力がかなり低下してしまうようだ。対策を見ていると、どうも近々に復旧の見込みは無いようで、電力が足りないことが長期間続くことになる。政府が節電の呼びかけとともに、輪番停電を実施することを予告している。 確かに節電はやりたい。被災された方には心からお見舞いしたいし、時間の許す限り貢献したいと思う。人によってはこんな時に自宅サーバなんてもってのほかという人もいるだろう。でも現時点で家の中の全てのデータ、メール、インフラの制御を全て自宅サーバにやらせている俺としてはサーバは可能な限り落としたくないものだ。なのでUPSを買って、停電時には自動的にシャットダウンし、復電時には自動的に稼働を開始することにした。 UPSはCyberPower社のBackup CR900(型番: CP900SW JP)を買った。ヨドバシカメラで22,000円程度。出力も540Wと値段にしては非常に大きい。Linuxに対応していることも選択のポイントであった。ただ、実際に試験していると100Wほどの負荷であるのにバッテリの減衰は思った以上に速い。10分保てば御の字、といったところ。それでもその間に正しくシャットダウンし電源を停止すれば、データは守られる。 電源の接続自体はなんのことはない。ソフトウェアはホームページからLinux(32bit/64bitあり)をダウンロードすることができる。俺の場合はtarballをダウンロードしCentOS5.5に入れた。USBケーブルでUPSとサーバを接続する。特に問題なく動作する。(素晴らしい!) UPS運用のキモは自動シャットダウンと復電後の自動起動だと思う。各ハードウェアのBIOS設定(復電時に自動的に電源を入れるようにする)、各VMの起動、起動後のサービス動作確認など、スクリプトを作り込み細かな調整をして何度も試験すべき。最終的に電源を抜いて正常シャットダウン、電源を刺して各サービスまで含めて正常起動するようスクリプトを作り込んだ。停電時、サービス復旧時にはSMSでiPhoneにメールも飛ぶようにした。 こちらの準備はOKだ。いざ停電のある世界へ!

地震

仕事中にあって、3時過ぎに帰宅した。いろいろ感じたことを箇条書きに。 * 東京はダメ。いままでのいろいろな対策は結局役に立たなかった

  • 議論に意義はない
  • 携帯よりネットは強い。ただしサービスはアメリカのものしか意味なし
  • 普段散々嫌がらせしてる奴ほど助け合い精神とか強調してくる。ちゃんとしてる奴は黙って行動する

Google Authenticatorで2段階認証を行うことができるらしい

それ、Gentooだとどうなる?: Google Authenticatorを使ってLinuxのログイン(PAM)で二段階認証を試す nunnun’s weblog:Google Authenticatorで2段階認証を行う [Debian] こんどやってみよ

今日はkvmの仮想マシンのバックアップ方法を確認した

先週kvmマシンのHDDがクラッシュし、OS+3つのVMを再インストールするはめになった。毎回やるのもダルいので、せめてVMは一発復旧させたいなあといろいろ調べて、なんか確立したっぽいので以下にメモ。 一応我が家はこれで動いているようですがat your own riskでお願いします。復元できなかったりなんか不具合あっても責任取れません ### バックアップ方法

VMを静止した状態で、設定ファイル、メモリイメージ、仮想ディスクをコピーしておけばいい。ディスクイメージの種類はrawでも、qcow2でもいい。具体的なコマンドにすると以下のような感じ

virsh dumpxml > # virsh save # cp ### リストア方法

OSインストール後以下のような感じにする

cp # virsh define # virsh restore いろいろ調べたけど、kvmの場合Live Backupはできないみたいなんだよね・・・。もちろんVMの中でバックアップ動かすのはありだけど。なんかダルいし。花粉症だし。

今日はflybackのバックアップを整理するスクリプトを作った

flybackはとっても便利だ。少ない容量で大量の期間のバックアップを作成することができる。通常バックアップというと、フルバックアップと差分バックアップで、1週間に一度フル、毎日差分、となると、1週間(7日)のバックアップを維持しようとすると、バックアップ元の2.6倍くらいの容量を確保しておく(異論あるかもしれない。俺は職場でそんなふうに教えられた)ようなところが、同じ容量でより多くの、しかも完全なバックアップを持つことができる。 マイコミジャーナル:あのTime MachineをLinuxで? - バックアップツール「FlyBack」が登場 上の記事を読んでFlybackを使い始めてはや3、4年になるが、確かにより頻繁にバックアップでき、より長期間保存できる。今の所バックアップ元をホームディレクトリ(約3G)、バックアップ先を250Gに指定しているが、ほぼ15〜20ヶ月ほどの2時間ごとのバックアップにさかのぼることができる。しかもどの地点にも更新されていないものも含めて全てのファイルがあり、cpコマンドやtarコマンドなどで簡単にリストアすることができる。すごい。 ただ唯一の欠点は、過去のバックアップの削除は完全に手動になってしまう所。更新されていないファイルはハードリンクになるので、削除しても削除しても容量が減らず、どこまで削除していいかわからないので、今まではえいやで2、3ヶ月まとめて削除していた。ただFlybackのインスパイヤ元のTimemachineはその辺りも考慮されていて、過去のバックアップは適宜間引いて残すようにしている。過去1ヶ月のものは1日おき、それ以前は1週間おき、という感じに。 やっぱりFlybackでも同じことをしたいなあというのが動機。 で、作った。perlスクリプト(ダウンロード)。 注意事項:ある程度テストはしていますが完全に動作する保証はありません。あなたの大切なバックアップが消えても何ら責任は取れません。未実装の機能が若干あります。 cronから実行することを想定してます。コマンドパスはOpenIndiana想定なので環境に合わせて適宜変えていただきたい。Perlモジュールについては各自なんとかしていただきたい。Flyback使ってる人が何人いるのかわからないけど、誰かが便利だなあと思ってくれるとうれしい。

今日はHP MicroserverのIPMIデータをmuninで見れるようにした

この前の話の続き。

で、munin-nodeはプラグインでいろんな機能をつけているのでIPMIとかあるんじゃねとか思ったらデフォルトでプラグインが用意されている。がイマイチよくわかんないのでスルーして他のものを探す。ぐぐったらこんなページがあったので、設定もいろいろできそうだしこれでいこうと。先に書いておくと、スクリプトの中ではOpenIPMI使うように書いてあるが、OpenIndianaデフォルトのipmitoolでいけました。

まずモジュールをダウンロードして所定の場所におく(ウチの場合は/usr/local/munin/lib/plugins)。chmodで実行権限をつけておく。

1
2
# ls -l ipmitool_sensor_-v3
-rwxr-xr-x 1 root root 17026 2011-02-20 19:05 ipmitool_sensor_-v3

次に/usr/local/munin/etc/pluginsからシンボリックリンクを張る。こんな感じに。

1
2
3
# ls -l ipmitool_sensor_*
lrwxrwxrwx 1 root root 37 2011-02-20 19:12 ipmitool_sensor_fan -> ../../lib/plugins/ipmitool_sensor_-v3
lrwxrwxrwx 1 root root 37 2011-02-20 19:12 ipmitool_sensor_temp -> ../../lib/plugins/ipmitool_sensor_-v3

で、スクリプトのなかを見ながら設定ファイル(/usr/local/munin/etc/plugin-conf.d/munin-node)を書く。以下のような感じ。

1
2
3
4
[ipmitool_sensor*]
user root
timeout 20
env.ipmitool_options -I lanplus -H <IPMIのIPアドレス> -U admin -f /root/ipmipassword sensor

パスワードのファイル(/root/ipmipassword)にはIPMIにアクセスするためのパスワードが平文で入ってる

で、munin-nodeを再起動する。

1
2
3
4
# ps -ef|grep munin-node
 root 19046     1   0 19:35:14 ?           0:00 /usr/bin/perl -wT /usr/local/munin/sbin/munin-node
# kill 19046
# /usr/local/munin/sbin/munin-node

で、しばらく待ってるとグラフが出てくる。なんか出てこなかったらmunin-nodeのホスト上のログファイル(/var/log/munin/munin-node.logとか)を見て各自なんとかする。

Enjoy !

今日はHP Microserverにリモートマネジメントカードを追加した

最近家のサーバの状態をmuninで見始めた。いろいろなリソースの状況が見れてそれはそれでとても便利なのだが、ファイルサーバであるHP MicroserverについてはOSがOpenIndianaということもあってか勝手が違う。

※muninがどういうものかについてはここを参照。一言でいうと監視の中でも「リソース監視」をしてくれるプログラム。まだできてないけどSNMPとも連携できるらしい。出力のサンプルをアップロード(.mht形式)しておいた。こんなんを見るですよ。

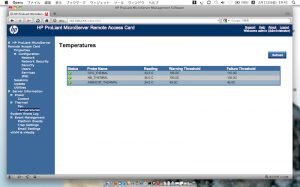
特に欲しかったのはディスクや筐体の温度の情報だったのだけど、Linuxではlm-sensorsでさくっと取れるんだが、OpenIndianaでは取れない。いろいろ調べているとどうやらOpenIndiana(OpenSolaris系)ではそのへんはBCMやIPMIでなんとかせよ、ということであった。

ということで、HP DirectPlus(法人のお客様(従業員500名未満))でリモートマネジメントカードを購入。税込¥8,400でした。入金後1週間ほどで手元に来る。

開けると簡単な取付説明書(英語)、安全のしおり、カード本体が入っている。

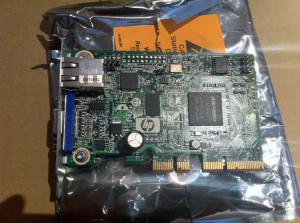
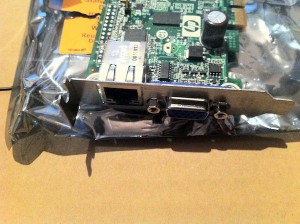
ボードはこんな感じ。EthernetのコントローラがBroadcomのチップ、IPMIのコントローラとしてASpeed AST2150がついている(ここにそこはかとない不安を感じる・・・)。コネクタとしてはEthernetのコネクタと、VGAのコネクタがついている。

とりあえずこれでとりつけはできるんだけど、事前にMicroServerのUser’s Guide(PDF)とMaintenance and Service Guide(PDF)をダウンロードしておいた方がよい

じゃあMicroserverをシャットダウンする。

まず裏側のPCIブラケットを固定しているレバーを外す。絵で見るとなんかよくわかんなかったので動画で取っといた。レバーを外したら、マイナスドライバーを使って内側のPCIブラケットのねじを外し、ブラケットを引き抜く。

ここにビデオが表示されます。Firefox3.5以降で対応

次に前面を開けて、ベースボードを引き出す。引き出し方はややこしいのでマニュアルを見ながら各自なんとかする。

ベースボードの内側のPCIスロットにマネジメントカードを取り付ける。

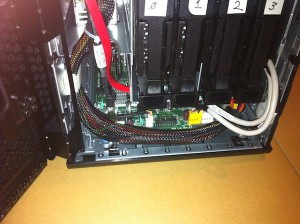
取り付けたらベースボードを筐体に入れる。入れ方もこれまたややこしい。各自知恵と勇気でなんとかすることを推奨するが、俺的コツとしては、(1)ベースボードを入れたら背面のコネクタの穴から指を入れて、ベースボードのUSBコネクタに引っ掛けながら気持ち持ち上げるようにして、各コネクタが穴から出るようにする(2)じわじわとボードを入れながらじわじわと各コネクタを接続していく(3)SASファンアウトコネクタは一見入ったように見えて入ってないややこしい(4)最後にベースボードのねじを締めるときはケーブルでねじを押さえたり引っかかってたりしてないか確認しながらやる、という感じです。

PCIブラケットのねじを締めて、レバーを元に戻す。

ここにビデオが表示されます。Firefox3.5以降で対応

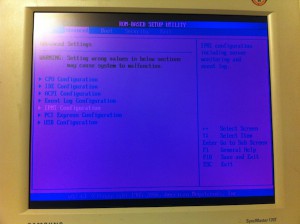
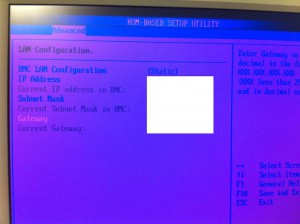
で、Ethernetケーブル2本、USBキーボード、VGAケーブルを「リモートマネジメントカード側に!!(超重要)」差して、電源ON。BIOSに入って"IPMI Configuration"を選ぶ。

IPアドレスを決めて、Save & Exitで保存する。

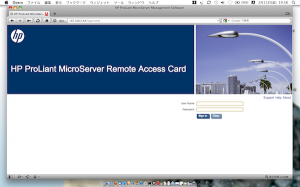
とりあえずOSは起動しているので、今度はIPMIを見ることをやる。使っているのはMacなので、どうやらSafari, Firefoxではブラウザの管理インターフェイスがうまく使えないらしい。Operaならメディア・リダイレクションを除いてうまく動くらしいのでOperaで先ほどBIOSで設定したIPアドレスを開く。

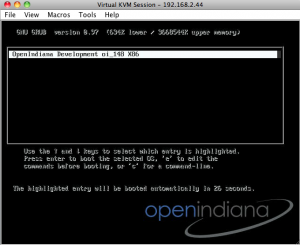
果たして上手く動いた。Remote KVMもとりあえずは動いているように見える。

じゃあ次はホストOSのOpenIndianaからセンサー情報を取ってみる。OpenIndianaにはipmitoolパッケージ(pkg:/system/ipmi/ipmitool)を入れておく。

 1
 2
 3
 4
 5
 6
 7
 8
 9
10
11
12
root@saba:~# ipmitool -I lanplus -H <リモートマネジメントカードのIPアドレス> -U admin sensor
Password: 
Watchdog         | 0x0        | discrete   | 0x0080| na        | na        | na        | na        | na        | na        
CPU_THEMAL       | 34.000     | degrees C  | ok    | na        | na        | na        | 105.000   | 110.000   | na        
NB_THERMAL       | 36.000     | degrees C  | ok    | na        | na        | na        | 100.000   | 105.000   | na        
SEL Rate         | 1.000      | messages   | ok    | na        | na        | na        | 75.000    | 90.000    | 99.000    
AMBIENT_THERMAL  | 25.000     | degrees C  | ok    | na        | na        | na        | 40.000    | 45.000    | na        
EvtLogDisabled   | 0x0        | discrete   | 0x0080| na        | na        | na        | na        | na        | na        
System Event     | 0x0        | discrete   | 0x0080| na        | na        | na        | na        | na        | na        
SYS_FAN          | 1200.000   | RPM        | ok    | na        | 0.000     | 500.000   | na        | na        | na        
CPU Thermtrip    | 0x0        | discrete   | 0x0080| na        | na        | na        | na        | na        | na        
Sys Pwr Monitor  | 0x0        | discrete   | 0x0080| na        | na        | na        | na        | na        | na

次はこの情報をmunin-nodeに取り込めばいいんだけどここまで。 Enjoy Microserver!

GTK+ 3 IS HERE

GTK+ 3がめでたく2月10日にリリースされた!以下ブログの翻訳(俺訳なので誤訳あるかも。正確なのは原文をあたってね。訳文のカッコ、リンクは俺) GTK+ 3 が出た!

GTK+ 3 のリリース

This marks the end of several years of work. It has been quite a journey, with some interesting turns and a few lessons learned. I may write about that another time. For now, I want to focus on the celebration.

この数年の作業の末に、GTK+ 3をリリースした。その間のいくつかの面白い展開、学習はまさに旅と呼ぶにふさわしい。それについてはまた別の機会に書こうと思うが、今はただリリースを喜びたい。

GTK+ 3における新機能

The GTK+ 3 effort started out as a ‘big cleanup’ effort, but over time, we’ve added a number of noteworthy features

GTK+ 3に対する取り組みは「(GTK+ 2の)全面的なクリーンナップ」として開始したが、時を経るにつれ、私たちはいくつかの機能を付け加えていった。

  • Cairo drawing throughout. GDK no longer wraps the antiquated X11 drawing API; we’ve made a clean break and exclusively rely on cairo for all our drawing needs now. This has also enabled us to remove several other X11-centric concepts such as GCs, colormaps and pixmaps. The hero who did most of this work is Benjamin Otte (Red Hat).
  • Cairoが全ての描画を行う。GDKはもう古めかしいX11描画APIのラッパーではない。私たちはX11描画APIと決別し、Cairoに全ての描画を依存するようにした。これにより他のX11依存の機能、例えばGC(GDK Graphics Context)やカラーマップ、pixmapなども捨てることができる。Red HatのBenjamin Otteがほとんどの作業を行った英雄である。
  • Modern input device handling. The input device handling in GDK has long been a sadly neglected area (not least because most of the core GTK+ developers are not regular users of ‘exotic’ input devices). This has changed; with 3.0, GTK+ steps into the modern world of XI2 with full support for multiple pointers, keyboards and other gizmos. The person who deserves the credit for this is Carlos Garnacho (Lanedo).
  • モダンな入力デバイスのコントロール。GDKによる入力デバイスの制御は、悲しいことに長い間なおざりにされてきた(ほとんどのGTK+コアディベロッパーは’風変わり’な入力デバイスのユーザーではなかった)。しかしこの状況は変化した。GTK+ 3.0ではモダンなXI2(によるバックエンド)により、複数のポインタ、キーボード、その他のデバイスをサポートする。LanedoのCarlos Garnachoがこれに貢献した。
  • A new theming API which sports a familiar CSS syntax for theme configuration and other improvements such as animated state transitions. This is also largely the work of Carlos.
  • 新しいテーマAPI。CSSに似た設定と、状態変化時のアニメーションをサポート。こちらもCarlosによる貢献。
  • More flexible geometry management, with support for height-for-width, for both widgets and cell renderers. After an initial SoC project by Mathias Hasselmann, this feature was finally brought over the finish line by Tristan Van Berkom (Openismus), who is also maintaining glade and keeping it up-to-date for GTK+ 3.
  • より柔軟なジオメトリの制御。高さ、幅、ウィジェットとCell Renderer双方に適用可能。SoC(Google Summer of Code)におけるMathias Hasselmannのプロジェクトの後、OpenismusのTristan Van Berkomによって完成した。TristanはGlade(インターフェイスデザイナ)のGTK+ 3サポートメンテナでもある。
  • Multiple backend support for GDK. With GTK+ 2.x, you had to recompile your application to have it work with a different GDK backend, since GDK backends were separate libraries. In 3.0, multiple GDK backends can be built into a single library and selected at runtime. This will make it much easier to move from e.g. X11 to Wayland or from Quartz to X11.
  • GDKが複数のバックエンドをサポート。GTK+ 2.0ではGDKバックエンドが分離していたため、異なるGDKバックエンドを使用するにはアプリケーションをコンパイルし直す必要があったが、GTK+ 3.0ではGDKバックエンドは1つのライブラリになり、実行時に選択できるようになった。これによりX11からWaylandへの移行や、QuartzからX11への移行などがより容易になる。
  • Easy application support. With the integration of D-Bus support in GIO, we could finally add a GtkApplication class that handles a lot of the platform integration aspects of writing an application, such as keeping track of open windows, ensuring uniqueness, exporting actions, etc. This is still a bit of a work in progress, and will be expanded during the 3.x cycle. What we have now is there mainly thanks to the effort of Colin Walters (Red Hat) and Ryan Lortie (Codethink)
  • 容易なアプリケーションサポート。GIOD-Busサポートにより、多くのプラットフォームをサポートできるGtkApplicationクラスを追加した。これにより開かれているウィンドウやプロセスの管理、エクスポートをプラットフォーム非依存で管理することができる。作業はまだ継続中であるが今後の3.xリリースの中で拡張されていくであろう。Red HatのColin Walters、CodethinkのRyan Lortieに感謝したい。
  • Of course, there’s some new widgets as well, such as a switch and an application chooser.
  • もちろんスイッチ(GtkSwitch)やアプリケーションチューザー(GtkAppChooser)といった新しいウィジェットもある。 Calling out the heroes of GTK+ 3 like this is inherently a bit unfair to the hundreds of other contributors that we have, but it would be *really *unfair to not also mention Javier Jardón, who has been tirelessly working on the initial cleanup tasks, and has generally done a lot of the thankless janitorial work.

上記のGTK+ 3の英雄たちに言及することは、多くの他のコントリビューターに対して公平ではないかもしれないが、Javier Jardónに言及しないことはもっと公平ではないだろう。彼は初期のクリーンアップ作業を根気よく行い、(上手くやったとしても)感謝されることもない管理作業を紳士的に行った。

次にどうするか

As always, we didn’t achieve all the things that we wanted to get, and things have been left unfinished. So, in the near future, I expect us to complete the extended layout and theming work inside GTK+, and generally make sure that GTK+ 3 works well for GNOME 3.0. I also expect that will pick up the application support topic again and add some of the bells and whistles that are needed for GNOME 3 applications, such as jump list and application menu support.

いつもの通り、我々はやるべきことを全て終わらせた訳ではないし、達成できていないこともある。近い将来テーマに関する作業と、レイアウトに関する作業を終了するだろう。またGNOME 3.0に対してGTK+ 3が上手くあわせられるようにする作業もできるだろう。その後に、アプリケーションから見た場合にGtk+ 3に必要な事項に見極め、取り組むことになるだろう。例えばジャンプリストや、アプリケーションのメニューのサポート等がそれにあたる。

At the GTK+ hackfest in La Coruna last October, we had the chance to talk about more far-reaching changes like paint clocks, animation, windowless scrolling, capture/bubble event propagation, a Wayland backend, etc. We have been slacking off on turning these ideas into a roadmap for GTK+ beyond 3.0, but this is another topic that we will pick up again after the dust settles.

昨年10月にア・コルーニャで行われたGTK+ hackfestで私たちはより先のことについて話し合う機会があった。例えばペイントクロックや、アニメーションや、ウィンドウレスのスクロールや、イベントのキャプチャや伝播についてや、Waylandとの連携などである。これらの事項はGTK+ 3.0以降のロードマップには含まれていないが、(GTK+ 3のリリース、リリース後の作業などの)混乱が収まった後に、再度取り上げられるべきトピックである。

GTK+ 2.xはどうなる?

As I said in my release announcement, 2.24 is the ‘final’ release of GTK+ 2.x. I expect to continue fixing bugs and doing occasional 2.24.x maintenance releases for many years to come. If the past is any guide, I will do this until retirement – after all, there are still people using GTK+ 1 applications…

リリースアナウンスメントの通り、2.24は「最終の」GTK+ 2.xリリースである。バグの修正や、それに伴う不定期の2.24.xのメンテナンス・リリースは今後数年に渡り発生するかもしれない。過去の経緯を見てもわかる通り、私はGTK+ 2.xのメンテナンスをそのリタイアまでやることになるだろう。世の中には今だGTK+ 1を使ったアプリケーションも存在しているのだ。

どこで手に入れるか?

You can find the release in the usual place:

ftp://ftp.gtk.org/pub/gtk/3.0/ http://download.gnome.org/sources/gtk+/3.0/

The documentation is available online at:

http://library.gnome.org/devel/gtk3/3.0/

Note that these links might take a few hours to go live.

以下のページから手に入れることができる。

ftp://ftp.gtk.org/pub/gtk/3.0/ http://download.gnome.org/sources/gtk+/3.0/

ドキュメントについては以下を利用することができる

http://library.gnome.org/devel/gtk3/3.0/

おそらく上記のリンクはこの数時間で利用可能になるだろう

きょうは薑汁撞奶の作成に成功したのでレシピ書いて忘れないようにしておく

薑汁撞奶とはGinger Puddingで、牛乳をショウガで固めたプリン。まずこの動画を見るべし。 おもむろに期待がもりもり出てきた所で材料。 * しょうが1かけ(ちっちゃいのじゃない普通のやつ)

  • 成分無調整の牛乳
  • 砂糖
  • 黒密か、練乳 作り方にこつがいる。概ね上の動画の通りだけど若干違う。 2. まずしょうがをおろし器でおろす
  1. お茶のこし器を使って汁を取る。(上の動画を参考に)
  2. 次に牛乳をお鍋で暖める。弱火でぬるくなる程度でいい。砂糖と黒密or練乳を溶かす。黒密はプリン1こにつき大さじ3杯程度。これだと甘さが足りないと思うので、砂糖も入れる。牛乳は熱くしちゃだめ。(動画だと結構熱くしてるけど俺はこのやり方でめっちゃ失敗した)
  3. しょうが汁をプリンにする器に入れる。大体コーヒーカップ1杯くらいでしょうが大さじ1杯ちょい。ちょっと多めにした方がいいかもしれない(入れすぎると辛くなるので注意)。しょうが汁は結構分離してしまうので入れる前に混ぜた方がいい。
  4. 暖めた牛乳を器に入れる
  5. 牛乳を入れたら蒸し器で10〜15分ほど蒸す。上の動画では蒸さなくてもいいようだけど、俺の場合は蒸さないと固まらなかった
  6. 蒸し器から出して、ラップでふたをしたら室温で冷やす。手で持てるくらいになったら冷蔵庫へ。 食べるときは黒密or練乳をかけて食べるとうまいと思う。 Enjoy!

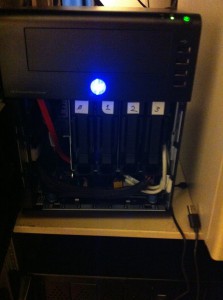
今日はHP microserverのディスクに番号を振った

なぜかHP microserverのディスクにはスロット番号が記載されていない。これだとディスクが壊れた時にどの番号でfailしているかわからなくて悲しい思いをするのでディスク番号をシールで貼った。 ・・・のはいいんだけど、一度抜いたディスクを差しても/deviceにエントリが作られないのでzfs replaceが効かず泣く泣く再起動。再起動後resilvringし始めるものの、CPUの能力が低すぎて、ユーザランドのサービスがまともに反応しないという落ちつき。家のPCはあらかたsambaで接続しているので軒並み接続が切れる。ちなみにNFSサービスはカーネルでやっているのか比較的接続できる(重いことには変わりない)。 家の中で結構いろいろなものをOpenIndianaのストレージに紐づけてるのでresilveringできるまでのあいだほとんど何もできないというのは辛いなあ。 (1/23追記:)上は間違いだった。変更したはずのresolv.confの設定が再起動後元に戻っていたことが原因だった。なんで戻っちゃうんだろう・・・ (1/27追記:)nwamを有効にしていたからだった・・・。でもまだdisableしてない

今日はLinuxのCUPSプリントサーバをAirPrintサーバにして、iPhoneからAirPrintで印刷するとPDFファイルが生成されるようにしてみた

ほぼここ(Ryan Finnie’s Blog: AirPrint and Linux)の邦訳になってしまうけど、やってみて、動いたのでやり方を書く。環境はCentOS5.5。 ### 1. まずcups-pdfをインストールする。

rpm -Uvh http://download.fedora.redhat.com/pub/epel/5/i386/epel-release-5-4.noarch.rpm # yum -y install cups-pdf 後で使うのでavahi-daemonも入ってなかったら入れておく。

2. CUPSサーバをネットワーク共有するようにして、印刷できる所まで確認する

iptables使っている場合は631/tcp, 631/udpを解放してアクセスできるようにする

/etc/cups/cupsd.confを編集して、ローカルホスト以外からアクセスできるようにする。編集箇所は赤字で記述。

# “$Id: cupsd.conf.in 7199 2008-01-08 00:16:30Z mike $” # # Sample configuration file for the Common UNIX Printing System (CUPS) # scheduler. See “man cupsd.conf” for a complete description of this # file. # MaxLogSize 2000000000 # Log general information in error_log - change “info” to “debug” for # troubleshooting… LogLevel info # Administrator user group… SystemGroup sys root # Only listen for connections from the local machine. # Listen localhost:631 Listen saba.mydomain:631 Listen /var/run/cups/cups.sock # Show shared printers on the local network. Browsing On BrowseOrder allow,deny # (Change ‘@LOCAL’ to ‘ALL’ if using directed broadcasts from another subnet.) BrowseAllow @LOCAL # Default authentication type, when authentication is required… DefaultAuthType Basic # Restrict access to the server… Order allow,deny Allow 192.168.1.0/24 # Restrict access to the admin pages… <Location /admin> Encryption Required Order allow,deny Allow 192.168.1.0/24 # Restrict access to configuration files… <Location /admin/conf> AuthType Default Require user @SYSTEM Order allow,deny Allow 192.168.1.0/24 できたらcupsを動かして、管理ページが見えるか確認。

chkconfig cups on # service cups start http://saba.mydomain:631/をブラウザで開いて、以下のような管理ページが見えればOK。

ターミナルに戻って、CUPS管理ページが使うSSL証明書を作成する。どうも本来は自動的に作成されるみたいだけど、CentOSのデフォルトでは作成しようとしてハングアップしてしまうみたい。ここを参照して、以下のような感じに作成した。

openssl req -new -x509 -keyout /etc/cups/ssl/server.key -out /etc/cups/ssl/server.crt -days 365 -nodes -config /etc/pki/tls/openssl.cnf Generating a 1024 bit RSA private key ..++++++ ………………..++++++ writing new private key to ‘/etc/cups/ssl/server.key’ —– You are about to be asked to enter information that will be incorporated into your certificate request. What you are about to enter is what is called a Distinguished Name or a DN. There are quite a few fields but you can leave some blank For some fields there will be a default value, If you enter ‘.’, the field will be left blank. —– Country Name (2 letter code) [GB]:JP State or Province Name (full name) [Berkshire]:Tongking Locality Name (eg, city) [Newbury]:Setaganya Organization Name (eg, company) [My Company Ltd]:orenocompany Organizational Unit Name (eg, section) []: Common Name (eg, your name or your server’s hostname) []:saba.mydomain Email Address []:root@saba.mydomain 再度ブラウザに戻って、プリンタを作成していなければ作成する。最終的に以下のような感じになっていればいいと思う。デフォルトプリンタにするかどうかは関係ないっぽい。

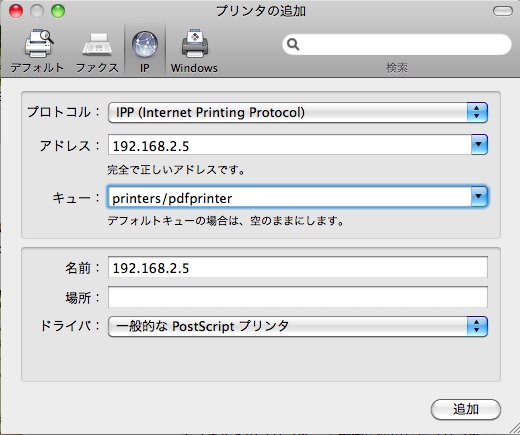
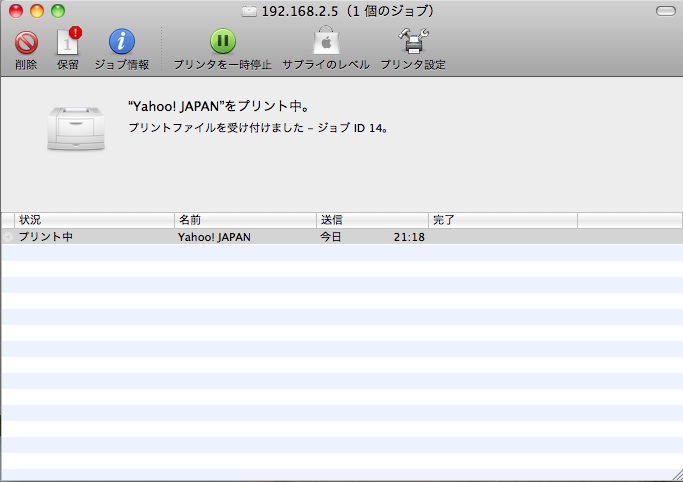
ここまでできたら他のPCから印刷できるかどうか確認する。ここではMac(Mac OS X 10.6.6)を使った。

3. AirPrint対応のプリンタを作成する

ここまででCUPSで作成したプリンタをPCで共有できるようになったので、そのプリンタをiPhoneのAirPrint対応にする。

AirPrintはマルチキャストDNS(mDNS。BonjourとかAvahiとか)でプリンタを発見するようだ。CUPSもAvahi経由でmDNS経由でプリンタとして見えてはいるが、そのままではAirPrintが見つけてくれないので、若干設定を追加してやる必要がある。

まずはmDNSで見えるプリンタの情報を取得するために、avahi-discoverを使う。CentOSの場合はavahi-toolsを入れれば使えるようになる。

yum -y install avahi-tools で、avahi-discoverを起動する。Xのウィンドウが出てくる。

avahi-discover

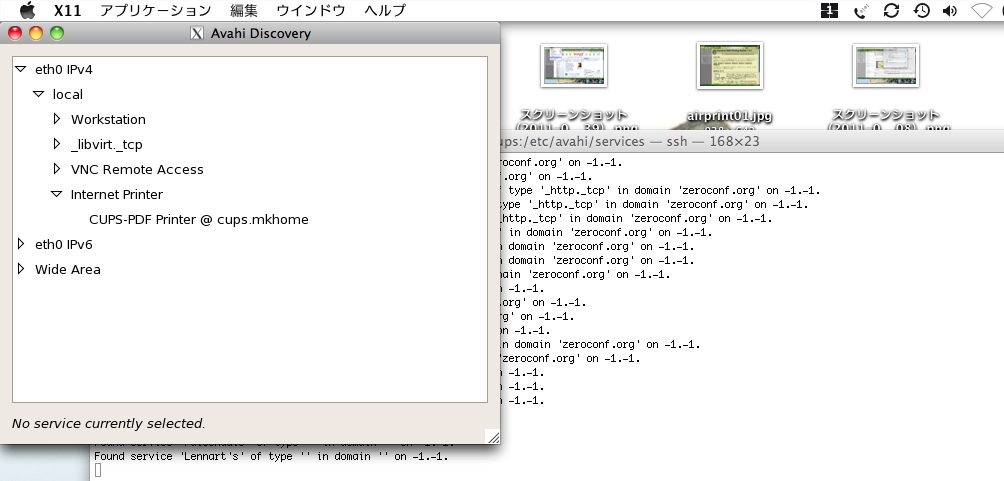
eth0 IPv4 -> local -> Internet Printer の下に、作成したプリンタがある。これをクリックする。

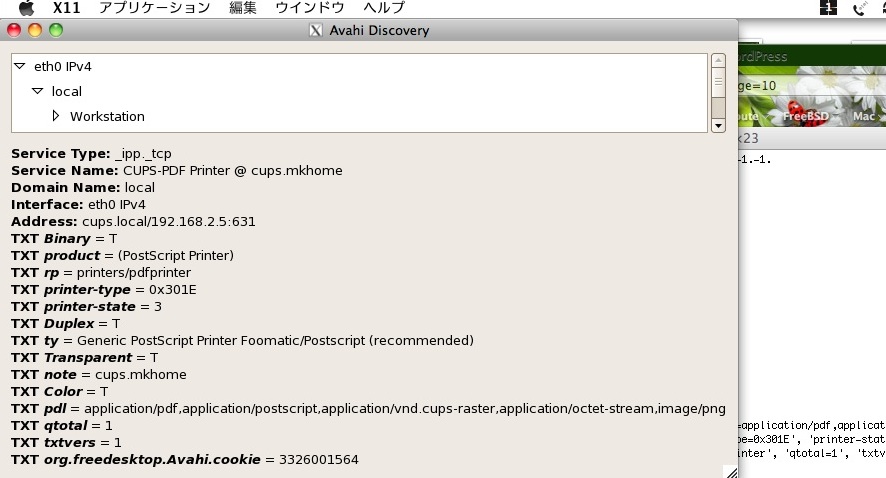
表示が変わるが、これだと後で加工しにくいので、ターミナルに出ている文字の方を使う。以下のような感じ。(適宜改行を入れてます)

Service data for service ‘CUPS-PDF Printer @ saba.mydomain’ of type ‘_ipp._tcp’ in domain ’local’ on 2.0: Host cups.local (192.168.2.5), port 631, TXT data: [ ‘org.freedesktop.Avahi.cookie=3326001564’, ‘pdl=application/pdf,application/postscript,application/vnd.cups-raster,application/octet-stream,image/png’, ‘Duplex=T’, ‘Color=T’, ‘Binary=T’, ‘Transparent=T’, ‘printer-type=0x301E’, ‘printer-state=3’, ‘product=(PostScript Printer)’, ’note=saba.mydomain’, ’ty=Generic PostScript Printer Foomatic/Postscript (recommended)’, ‘rp=printers/pdfprinter’, ‘qtotal=1’, ’txtvers=1’] 上記の出力を参考にして、/etc/avahi/services/<名前>.serviceを作る。<名前>の部分はなんでもいい。以下のような感じ。

注意点としては

  • txt-recordを書く順番はavahi-discoverの出力順の逆
  • txt-recordの最後にURF=noneを入れる

service avahi-daemon restart そうしたらiPhoneからプリンタが見えてるかどうか確認して、印刷!

Enjoy!

今日はOpenIndianaでsambaをサービスで動かした

この前の話の続き。前からやってたけどどうせならきれいに動かしたかったからいろいろ頑張ってみた。

1. sambaをmakeする

普通にソースコードをゲットしてmakeすれば動く。すげー。コマンドにするとこんな感じ

1
2
3
4
5
6
7
8
9
# pkg install developer/gcc-3
# wget http://www.samba.org/samba/ftp/samba-latest.tar.gz
# gtar xzvf samba-latest.tar.gz
# cd samba-3.5.6
# cd source3
# sh ./autogen.sh
# ./configure
# gmake
# gmake install

このままだと/usr/local/sambaの下に各種バイナリがインストールされる。実行するためにはライブラリパスを追加してあげる必要がある。ここを参考に設定した。具体的なコマンドは以下のような感じ。

1
2
3
# crle -c /var/ld/ld.config -l /lib:/usr/lib
# crle -u -l /usr/local/samba/lib
# crle -v  (←確認)

で、/usr/local/samba/var/smb.confファイルを心の赴くままに作る。/etc/samba/smb.confじゃないところに注意。

動くかどうかテスト。

1
2
3
# /usr/local/samba/sbin/smbd -D
# /usr/local/samba/sbin/winbindd -D
# /usr/local/samba/sbin/nmbd -D

ログは/usr/local/samba/varの下にできている。うまく動けばok。

2. サービスとして自動起動するようにする

とりあえず動いたものの、毎回手動で起動するのは億劫だし起動するのを忘れてなんで繋がらないの?とアワアワするのも大変なので、自動起動するように設定する。

知ってる人にはアレだけど、OpenIndiana(OpenSolaris)の起動シーケンスはLinuxのお作法とは違うので合わせるように書く。

まず起動・停止スクリプトを書く。こんな感じに。できたらスクリプト単体でstart/stopしてちゃんと動けばOK。

で、そのスクリプトを呼び出すようにmanifestファイルを書く。こんな感じに。

manifestファイルが書けたらfmri(?)に取り込む。以下のような感じ。

1
2
3
# svccfg
> import /usr/local/samba/var/samba.xml
> exit

ちゃんと取り込めてるか確認。

1
2
# svcs -a|grep samba
disabled       14:58:21 svc:/local/network/samba:default

ちゃんと起動、停止できるか確認。

1
2
3
4
# svcadm enable svc:/local/network/samba:default
# svcs -xv (なにも出なければOK)
# svcadm disable svc:/local/network/samba:default
# svcs -xv (なにも出なければOK)

Enjoy!

今日でkvm環境への移行が完了した

いままでOpenSolaris+VirtualBox環境でやってたけど、2個以上VM立てると時計が進まなくなったりしてたので、ストレージはOpenIndiana、いろんなサーバはCentOS,KVMでやってみることにして、今日ほぼ元の状態まで戻した。KVM超いい。3つほどVM立ててもメモリぜんぜん食わないし時計はちゃんと進むし.iSCSIでやってみたかったけどなんかよくわかんないので今後の課題かな・・・。あとはOpenIndianaでSambaがちゃんと動けばパフォーマンスもいいのでちょっと動向をウォッチしつつとりあえず放置かなあ・・・。

今日はCOMSTARに挑戦するもよくわかんないこと多くて疲れた

OpenIndianaのZFSボリュームをSambaでクライアントにマウントさせたい→pkg install service/network/samba→smb.confをOpenSolarisから持ってくる→svcadm enable svc:/network/samba:default→smbpasswd -a なまえ→smbpasswd -e なまえ→動かないorz ということでLinuxでSambaやるべ→家の仮想サーバのrootディスクはiSCSIでやるぜ→zfs create→sbdadm create-lu→stmfadm add-view→itadm create-target→CentOSからiscsiadm -m discovery -t sendtarget→見えるぜ→iscsiadm -m node IQN –login→できたぜ→virt-install→OpenIndianaのZFSボリュームをzfs set sharenfs=on→Linux(CentOS)でマウント→yum install samba→OpenSolarisで使ってた設定ファイルを持ってくる。→service smb start→動くじゃん・・・まあいいか使えれば・・・→他のサーバも同じように作るべ→作った→CentOSでls -l /dev/disk/by-path→う〜んどっちがどっちのディスクなのかよくわかんね(わかるけど)。しかも2個目のはLUN0とLUN1の2つ見えてるし。→ところでどっちのLUがどっちのIQNに繋がってるの?→わかんね・・・ という流れ。OpenIndianaでSambaがちゃんと動く&仮想サーバのrootディスクをiSCSIにしない、ということでシンプルになるんだろうか、と書きながら思った。COMSTAR使ってみたいんだけどなあ・・・よくわかんないなぁ・・・

デュープリズムのサントラ買った

ちょう懐かしい。PSPでもできるからやってみたいけど年始の休みで終わる気がしないわ。モンハンもあるし。これも音楽がいいからなあ。 Amazon: デュープリズム オリジナル・サウンドトラック 【ニコニコ動画】デュープリズム【CM】30秒 【ニコニコ動画】デュープリズム【CM】15秒

年をまたいでzfs send/receiveでファイルサーバをバックアップしてみた

結構ややこしい。慣れたり考え方を理解すれば楽勝だけど。ハマりポイントとしては以下のような感じか。

  • zfs sendできるのはスナップショットだけ。ライブのファイルシステムをコピーすることはできない。考えてみれば当然か。(コピー中にファイルシステムが変更されるとストリームとライブの整合性が失われる)
  • 2回目以降増分をzfs receiveするためには、受信側のライブファイルシステムが前回受信したスナップショットから変更されていてはいけない。これも考えてみればあたりまえ。ZFSは枝分かれスナップショットをサポートしていない(スナップショットからcloneしてpromoteすることで別ファイルシステムとすることはできるけど)。ロールバックでスナップショットに戻ることは可能。もちろんロールバックすると変更分は消える。

でも理屈が通っててわかると本当に気分がいい。ZFSがますます好きになった!順番に手順を書く。もっぱら将来の自分用に。

1. <送信側>スナップショットを取る

1
2
3
4
# zfs snapshot ore_no_tank@backup
# zfs list -t snapshot
NAME                                           USED  AVAIL  REFER  MOUNTPOINT
ore_no_tank@backup                                0      -  3.18T  -

詳細はOracleのZFS管理ガイドを見ればわかるが、REFERはそのファイルシステムが参照しているプール内のブロック(?)で、USEDは変更等の理由によりそのスナップショットから変更され、プール内のブロックを消費している量を指す。たぶん。

2. <送信側/受信側>zfs sendでスナップショットを送信する

スナップショットを送信する。ここではrootアカウントでやってるが、pfexecでやった方がいいのかもしれない。rootでのsshログインを許容するためにはユーザーロールを変更する(rolemod -K type=normal root)ことと、/etc/ssh/sshd_configでPermitRootLoginをyesにして、svcadm restart svc:/network/ssh:defaultする。(セキュリティが弱くなるのでちょう注意。作業が終わったら戻す方がいいよ)

1
# zfs send ore_no_tank@backup | ssh 192.168.xxx.xxx zfs receive -F ore_no_tank

-Fオプションで受信側のファイルシステムを強制的に置き換える。これ以降は受信側のファイルシステムには手で変更をくわえないようにする。といってもスナップショットにロールバックすれば元に戻るので。

送信後に受信側を見てみると、スナップショットも含めてコピーされていることがわかる。(zfs list -t snapshotしたときにUSEDに149Kのカウントされているのはスナップショット以降の変更分も一緒に受信しちゃってるのかもしれない。後ろの手順でやっている通り、一回zfs rollbackしておいたほうがいいかも)

1
2
3
4
5
6
# zfs list
NAME                       USED  AVAIL  REFER  MOUNTPOINT
ore_no_tank               3.41T  1.93T  3.18T  /ore_no_tank
# zfs list -t snapshot
NAME                             USED  AVAIL  REFER  MOUNTPOINT
ore_no_tank@backup               149K      -  3.18T  -

3. <送信側>再度スナップショット(増分スナップショット)を取る

容量が大きいファイルシステムや、複数で共有しているファイルシステムの場合、zfs send/receiveでコピーしている間にもいろいろファイルが作られたり消されたりする。その度にファイルシステム全体をコピーし直すのではいつまでたってもバックアップ先がバックアップ元と同期せずバックアップの意味がない。再度スナップショットを取って、差分だけバックアップ先に送るようにすればより頻繁にデータをバックアップできるチャンスが増え、より最新のデータに復元できたり、より精度高くデータを復元できる可能性が高まる。(例えば”先週のデータ”ではなくて、”昨日の15:30時点のデータ”とか)

送信側で再度スナップショットを取る。

1
2
3
4
5
# zfs snapshot ore_no_tank@backup2
# zfs list -t snapshot
NAME                                           USED  AVAIL  REFER  MOUNTPOINT
ore_no_tank@backup                            8.68G      -  3.18T  -
ore_no_tank@backup2                               0      -  3.18T  -

前回スナップショットを取ってから、8.68GB分の変更が発生していることがわかる。

4. <送信側/受信側>zfs sendで増分のみを送信する

再度スナップショットを送信する。送信側で"-i"オプションで増分計算元を指定していることと、受信側で"-F"オプションを外していることに注意。

1
# zfs send -i ore_no_tank@backup ore_no_tank@backup2 | ssh 192.168.xxx.xxx zfs recv ore_no_tank

増分を送信後に受信側の状態は以下のようになっている。増分のスナップショットが正しく展開されている。

1
2
3
4
5
6
7
# zfs list
NAME                       USED  AVAIL  REFER  MOUNTPOINT
ore_no_tank               3.42T  1.92T  3.18T  /ore_no_tank
# zfs list -t snapshot
NAME                             USED  AVAIL  REFER  MOUNTPOINT
ore_no_tank@backup                  8.67G      -  3.18T  -
ore_no_tank@backup2                     0      -  3.18T  -

zfs send/receiveした時に以下のようなエラーが出たら、受信側のファイルシステムが変更されている。zfs rollbackでスナップショットに戻ることで解決できる。

 1
 2
 3
 4
 5
 6
 7
 8
 9
10
11
12
13
14
15
<送信側>
# zfs send -i ore_no_tank@backup ore_no_tank@backup2 | ssh 192.168.xxx.xxx zfs receive ore_no_tank
cannot receive incremental stream: destination storage has been modified
since most recent snapshot
<受信側>
# zfs list -t snapshot
NAME                             USED  AVAIL  REFER  MOUNTPOINT
ore_no_tank@backup               149K      -  3.18T  -
# zfs rollback ore_no_tank@backup
# zfs list -t snapshot
NAME                             USED  AVAIL  REFER  MOUNTPOINT
ore_no_tank@backup              1.50K      -  3.18T  -
<送信側>
# zfs send -i ore_no_tank@backup ore_no_tank@backup2 | ssh 192.168.xxx.xxx zfs receive ore_no_tank
# (←成功したので何も出ない)

Happy ZFS !

年末にダライアスバースト買ってみたら面白かった

【ニコニコ動画】【良作】ダライアスバースト Iゾーン紹介【宣伝活動】 サンダーフォースⅥの苦い経験でどうなんだろと思ってたけどとても面白かった!The World of Spiritが燃えるよ!